Table of Contents
Physics GitLab Server
The pictures and documentation on this page based on the GitLab version installed in July 2017, if the information is outdated, feel free to remember us to update the documentation by sending a mail to linux@physik.fu-berlin.de
Detailed documentation
For a more detailed documentation about GitLab, please see: https://docs.gitlab.com/ce/user/index.html
Basic information/Summary
- Login via ZEDAT username and password (tab "FU-Login")
- Git access via SSH (recommend, using SSH keys) or HTTPS (using username and password)
Login
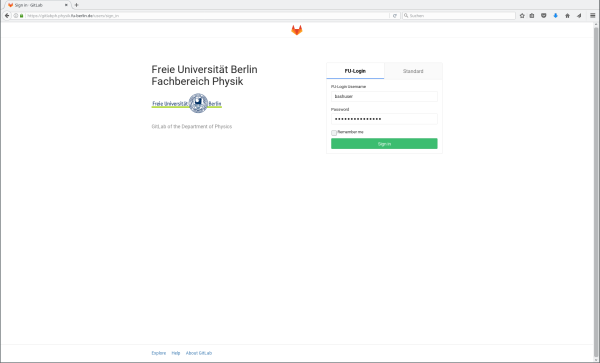
The GitLab can be accessed via https://gitlabph.physik.fu-berlin.de/ . On the login page you can login now using your ZEDAT username and password (preselected tab "FU-Login"):
First login
After the first login you get to the GitLab welcome page:
On the page there is already the most common two tasks listed: Creating a new project (also called repository) or creating a new group to work together with other users, both task are described below.
Create a project
A project in GitLab is a Git repository together with the tools provided by GitLab like access and user right management or collaboration functions (merge requests, wiki, …). If you create just a project without using the group feature, the project will be created in your user "namespace", this means the name of the repository is generated as "<username>/<project name>".
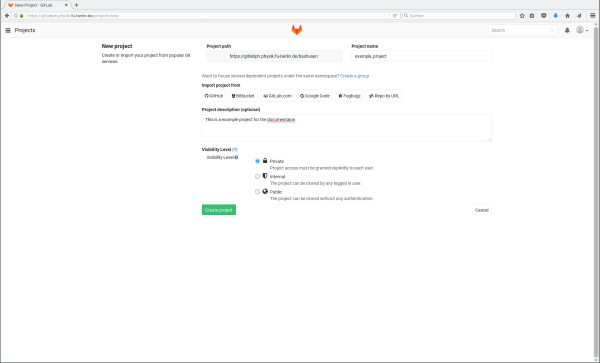
If you create a project, you have type in some information: The project name, optional the description and you have to select the visibility level: Private means that by default only have the permission to access the repo (or the members of the group, if this is a group project, respectively):
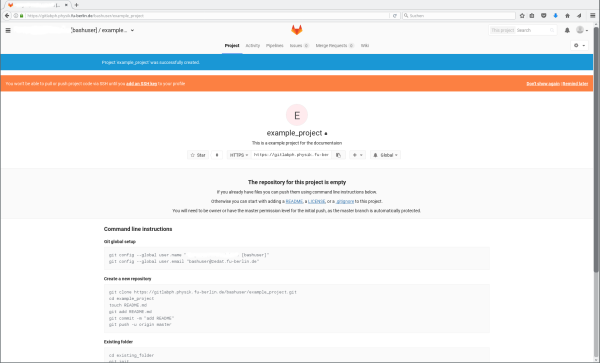
After the creation of the project you have a empty project now. The project page contains some basic information about how to create a new repository or upload an existing one to GitLab:
You can now work with the repository using the normal git commands, for a short overview about Git, you can take look into the manual about using Git in grouphome. For information about the access via SSH and HTTPS, see below.
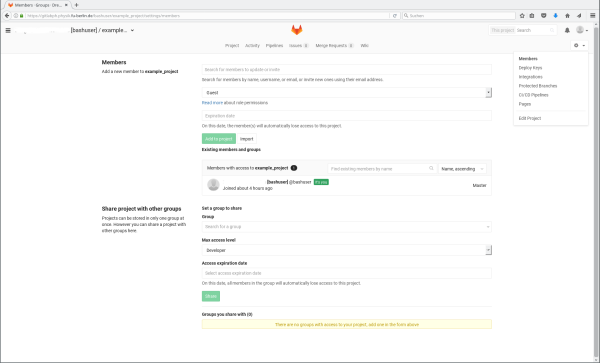
You can give other users access using the "Members" part of the project settings which can be found behind the gear-wheel in the right upper corner. For more information about the different user roles, use the "Read more"-link on the page.
Groups
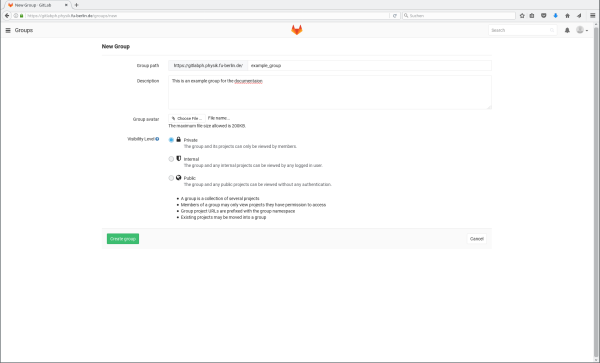
As noticed above you can also create groups to structure similar projects together with one central user management. The necessary settings to create a group are similar to the one of a project:
Inside a group you can create projects now similar to the one just for you as users. Also the member management for the whole group and all its project is similar to the one of a single project.
