This is an old revision of the document!
Table of Contents
Matrix
We are running a Matrix instance. Go to meet.physik.fu-berlin.de to use the web client, where you can log in with your regular Physics account credentials.
Matrix is an instant messaging protocal, and is accessed by using a client. Analogously to how email is a protocol, and Gmail is a client. Like with email, there are many clients for Matrix. Different people can use different clients to contact each other. A good client to start using Matrix with is Element. You can use the web version of Element at meet.physik.fu-berlin.de, or use other versions of Android Clients, iOS clients or Desktop clients (Windows, MacOS, Linux) or any other Matrix client to matrix.physik.fu-berlin.de
Upon logging in with your usual ZEDAT credentials for the first time you will be added to rooms according to your group membership.
Our Matrix server is not federated with the rest of the Matrix ecosystem, due to unresolved privacy questions, but we are giving access to external collaborators upon request.
Here is a guide for how to use Element.
First Steps
When you first log in at meet.physik.fu-berlin.de, you will see something like this

The important parts of the screen are these

- is the user menu
- is the bar of communities you are a part of
- is the button to join/make a room, and is on top of the (currently empty) list of rooms we are participating in
- is the button to start a direct message session with another user, and is on top of the (currently empty) list of direct conversations we are having
- Is a search box used to find a specific room/person in your contacts. The compass icon to the right of it is to explore public rooms.
We will now look at all of these in turn.
Direct Messages and Rooms
When you press the button to start a direct message (the plus button in the People tab) labelled with (4). You are presented with
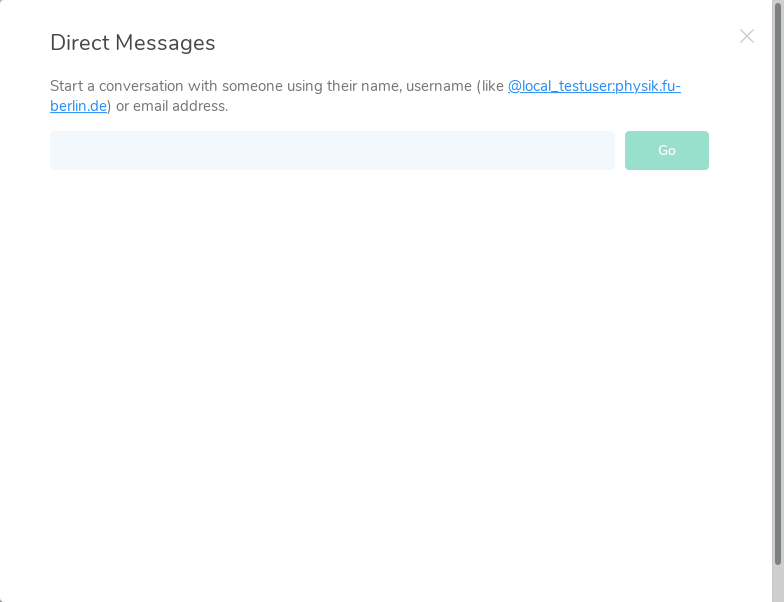 If you use Matrix for a bit longer it will be filled with suggestions, but for a new user, it is empty. In the box you can type the name or ZEDAT account of the person you are searching for. Press Go to invite the person to chat.
In this example we get an invite for such a direct message session. It pops up in the space where all our conversations are listed. By clicking on it we can choose whether to join or reject the conversation

If we join, we end up in the messaging window
 and can start to chat. For more information what Matrix allows have a look at Beyond Text.
Let's use this window to explain what we can see

At the bottom is the message box where you can enter your messages. To the right of the message box there are five buttons highlighted in red for (from left to right)
- adding attachments,
- emojis,
- stickers (currently not supported),
- starting a voice call, and
- starting a video call.
The latter will add a widget to a Jitsi room on our Jitsi instance on top of the message space if you have more than two people in a room or directly start a video call if you are only two.
Furthermore, there are another four buttons on top of the screen highlighted in red and labelled 2. From left to right:
- Pinned messages
- search within the chat
- access to your notifications, and
- room info (which also contains some more settings)
Rooms
A room is a group chat. You can create a room by pressing the plus button beside the rooms tab labelled by (3). Here you have the option to choose a room name, and whether the room will be public (searchable) or not. Once the room is created, you can invite individuals to it by pressing on the information button within the room, clicking invite, and then typing in their names.

To create a private room, just give it a name and optionally a topic and press Create Room. At first you will be alone, but you can invite more people via the user list.
If you press the "Make this room public" toggle, the window changes to
 and will allow you to give the room a permanent identifier, the room alias, which uniquely identifies the room.
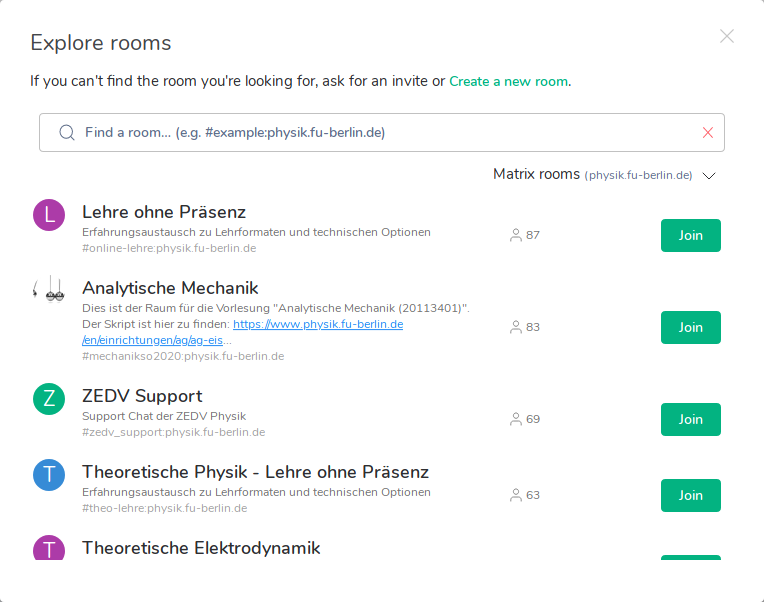
But what if you just want to join an exisiting public room. The Explore button (compass icon) (5) has you covered. When you click it you get a window where you can search the list of public rooms by name and room alias.
One such room is ZEDV-Support, where the Physics IT service answers support questions and generally interacts with users. It looks like a direct chat session, only with more people, because that's what it is.

Beyond Text
In the Matrix client we provide, you can do more than write simple text (and uploading files and images). You can style your text with Markdown, including Hyperlinks and syntaxhighlighted code.
We hope that TeX for math will be supported soon as well.
When you hover over one of your messages you get a little context menu, that we will explain now. The buttons are (from left to right) quick reactions, reply, edit and more options

Edits
Sometimes you have a typo and would like to fix it, with Matrix you can, just press the edit button on the message mouseover.
Before

After

Delete Messages
Have you sent something to the wrong person? You can delete messages via the delete options on the more options (three dots) message mouseover.
Before

After

Replies
Want to add some context that has already scrolled past in a busy room? The reply function has got you covered, just press the reply button on the message mouseover.

Tabcompletion
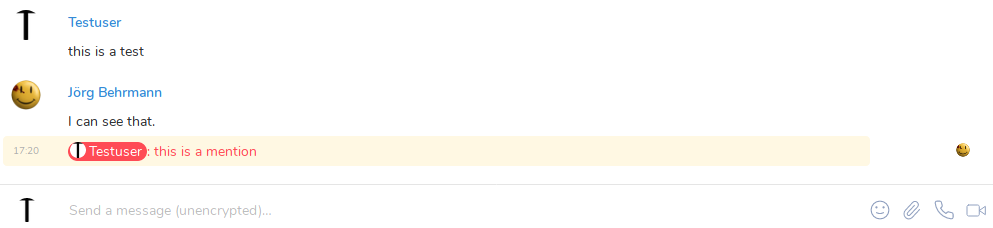
One last feature, names tabcomplete. If you start typing @ followed by the name or username of of a user, a little menu will pop up where you can choose the name by clicking or via the tab key if you are down to a single choice

This results in a mention that is highlighted for the user you mentioned.
Other things that tabcomplete are room names (starting with a #), emojis (starting with a :) and communities (starting with a +).
Further Steps
User Settings (Changing Your Name)
In the user menu (1) you can set many options.
 }}
}}
Among these settings are whether and how you want to receive desktop notifications, the theme you want (currently we only have the defaults light and dark), but also how your name is displayed and what your profile picture is.
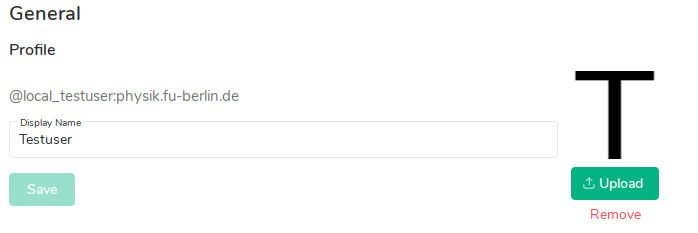
If you change your name or profile picture, other users will see it right away, but the menu will only show it once you log out and back in.
Leaving a room
You can use the context menu for rooms

Or you can just type /part as a message into the room.
Getting people into a room
You can directly link to a (public) room via the information button on the top right
 Press "Share room", and you will be presented with multiple means of sharing the room with someone

Communities
You might wonder, "I have a group of people, but we also have a set of topics and a single room for that might be confusing!" That is what communities are for, they group people and rooms and can have long descriptions. Unfortunately they are currently not searchable, so you have to know about them to navigate to their group page and join them. This should become more comfortable soon™️.
You can start a new community via the community sidebar (2).

After starting a community, you can add people and rooms via sidebars, just like adding users to a room.
When you join a community it gets added to your community sidebar. When you left-click on its symbol, your list of direct message sessions and rooms get filtered to members of your community and rooms belonging to your community, left-clicking again reverts to the default. Right-clicking on the symbol gives you a context menu to get to the community page.
End-to-End-encryption
End-to-end encryption means that only the parties participating in a conversation are able to decrypt and read the messages that were send. Our server is not able to decrypt the messages that were sent, preventing third parties to read the messages.
Upgrading encryption
This step is necessary if you have used encryption in the past on your matrix.physik.fu-berlin.de account. If you have not used encryption previously, you can jump to the section Setting up encryption for the first time
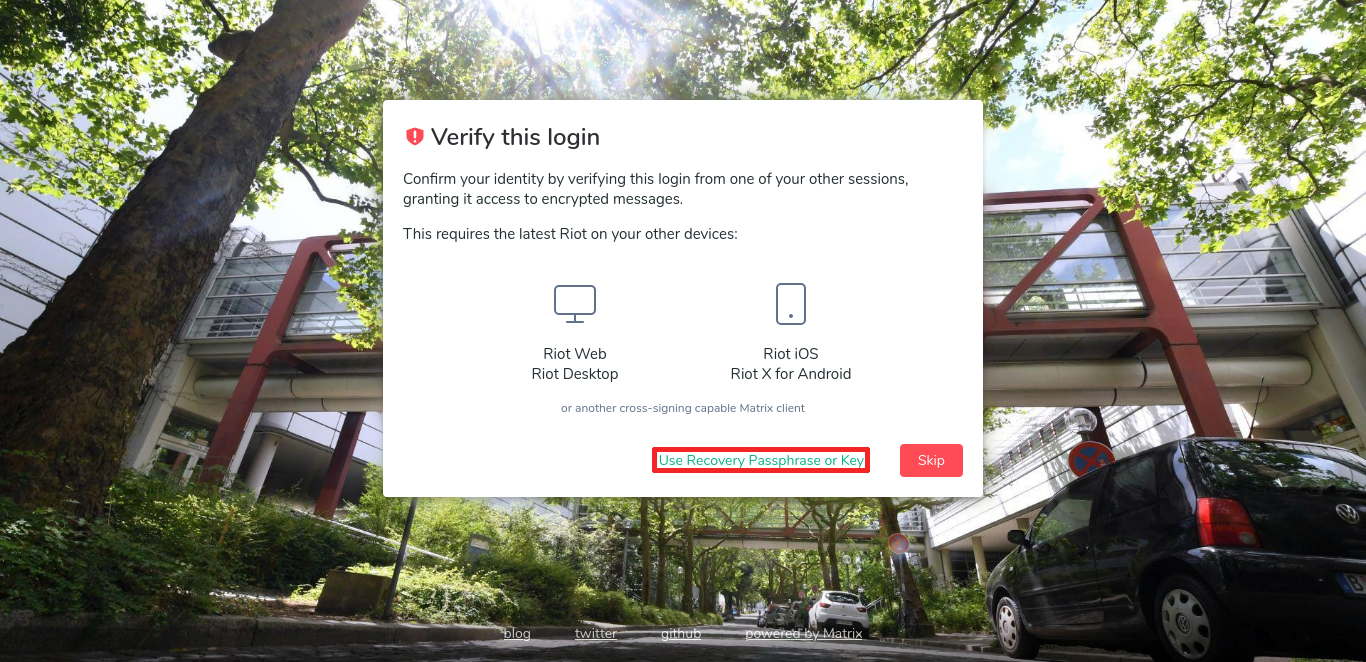
If you have used encryption before you will notice a small popup on the left side of the screen, asking you to upgrade. Click on the "upgrade" button to start the upgrade. 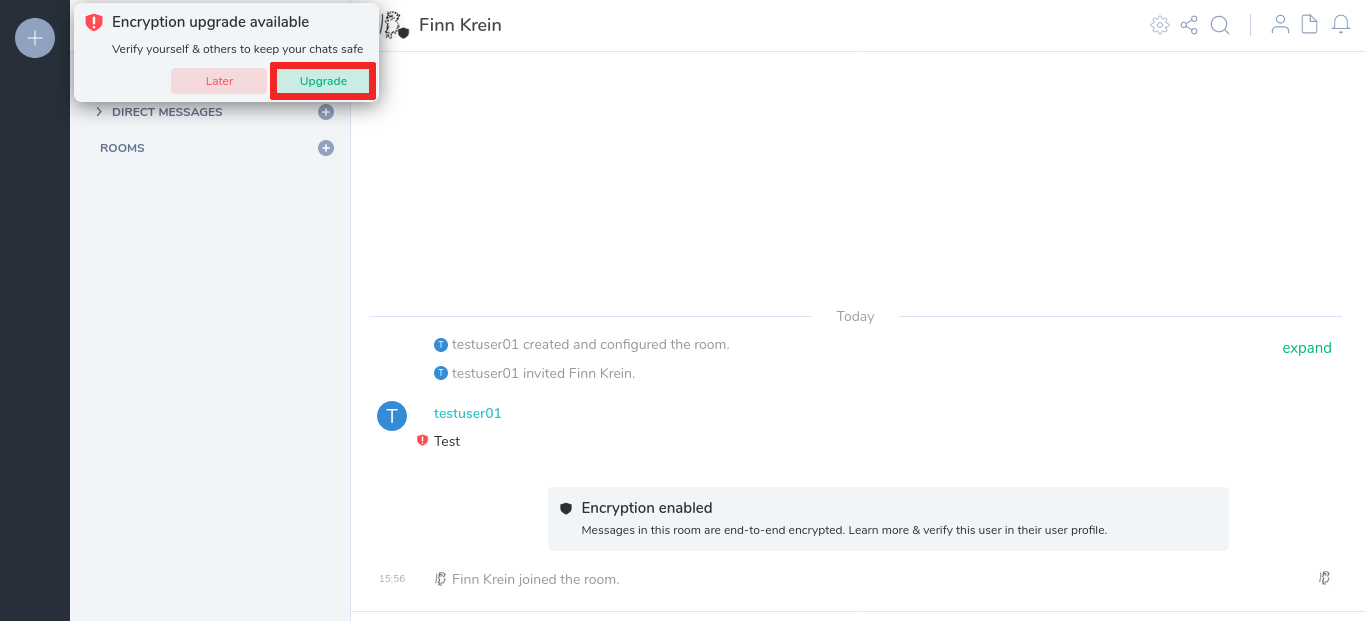 Next you will have to enter your ZEDAT-password…
  and enter your recovery passphrase you set when you set up key backups for encryption. If you can not remember your passphrase you can use the recovery key if you have still saved it somewhere. Alternatively you can set up a new key recovery. Your previous encrypted messages will still be available if you are able to read them on the device you are using to perform the upgrade.
This concludes the upgrade. You can now on read how to verify users in *Verify a user, or use encrypted chats without verification.
Setting up encryption for the first time
When you log in to Element, it will ask you to set up encryption recovery. This step will make sure that you can share encrypted messages across all your devices and different sessions. If you do not wish to use encryption you can skip this step. However as encryption will be used by default we highly recommend setting up encryption.
To setup encryption recovery you have to choose a secure passphrase.

Optional By default the server backs up your encryption keys, so you can recover your encrypted messages if you loose access to all sessions that had access to them. You can choose for the keys not to be saved on the server. They can still be transmitted from one active session of yours to another.
Additionally you can download a recovery key, which you can use if you forget or loose the passphrase.

Verification
This step is optional If you choose to not verify a user there will be a black shield displayed next to their user icon ![]()
For end-to-end encryption to be really secure users have to verify they are talking to each other. To do this each user is verifying each their devices, and additionally verifies every user once. Every device another verified user verified themselves will be considered verified.
A user you did not verify will be displayed with a black shield next to their user icon: ![]()
A user you verified, but who did not verify all of their devices will be displayed with a red shield next to their user icon: ![]()
A user you verified and who verified all of their devices will be displayed with a red shield next to their user icon: ![]()
Example: Alice and Bob start a conversation in their logged in sessions. For the encryption to be secure they have to verify they are actually talking to each other. In Element this is done by comparing a list of emojis that are shown to both users. Alice requests a verification with Bob and they verify they get shown the same string of emojis. When Bob starts using a new session (e.g. using a different Browser/Device) he can use the session that was verified with Alice's session to also verify his new session. Alice's session automatically sees that Bob verified the new session and accepts it into the encrypted conversation.
Verify a user
For this step to make sense you have to be able to communicate with the other user in a way that makes sure you are actually talking to them. For this we recommend video/audio-chat, or just sitting next to each other.
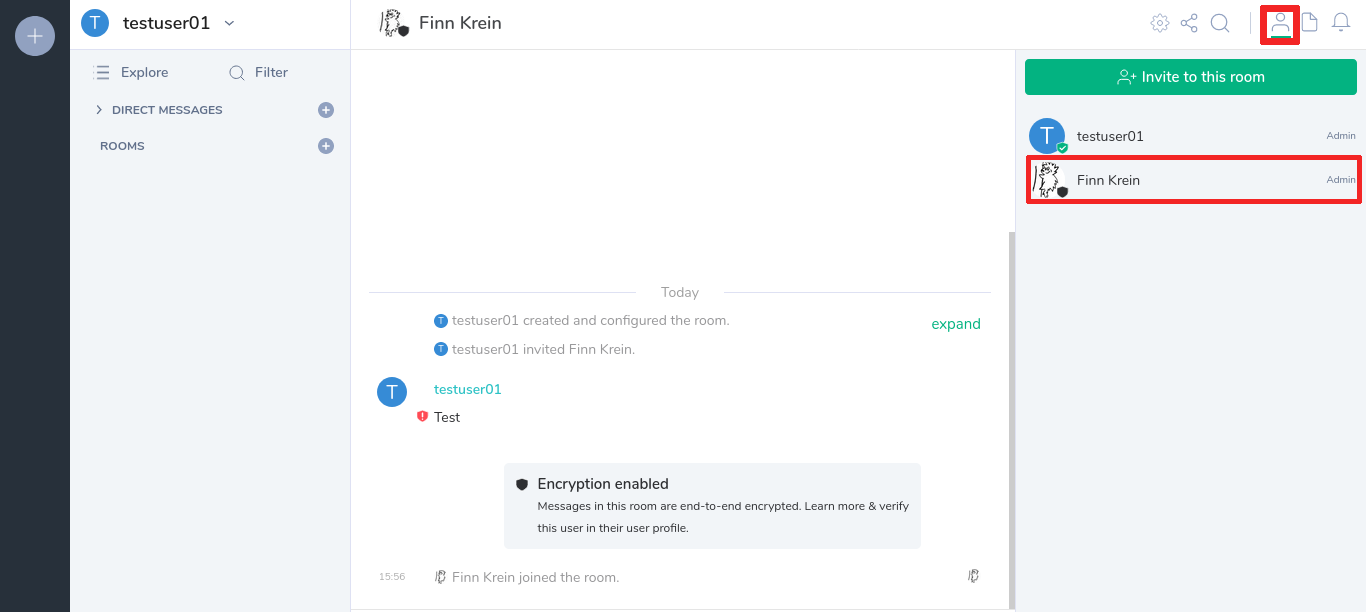
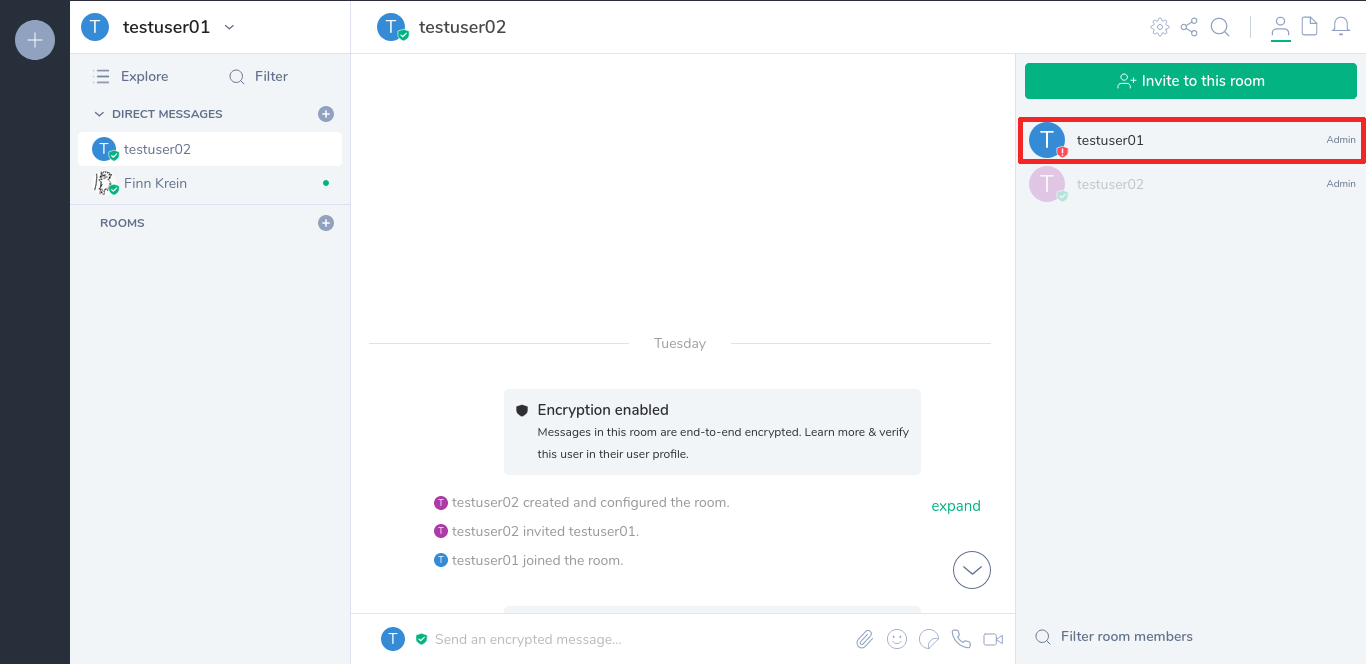
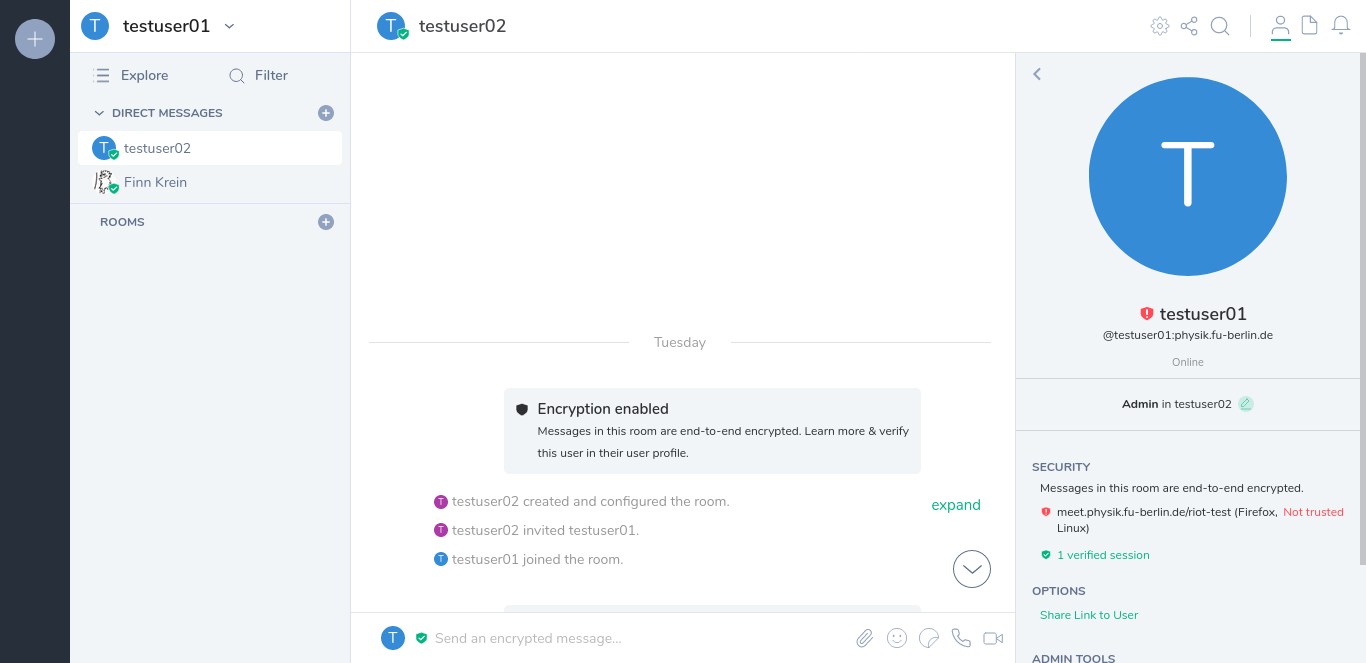
To verify a user you open a chat you share with the user and click their name in the user side bar.
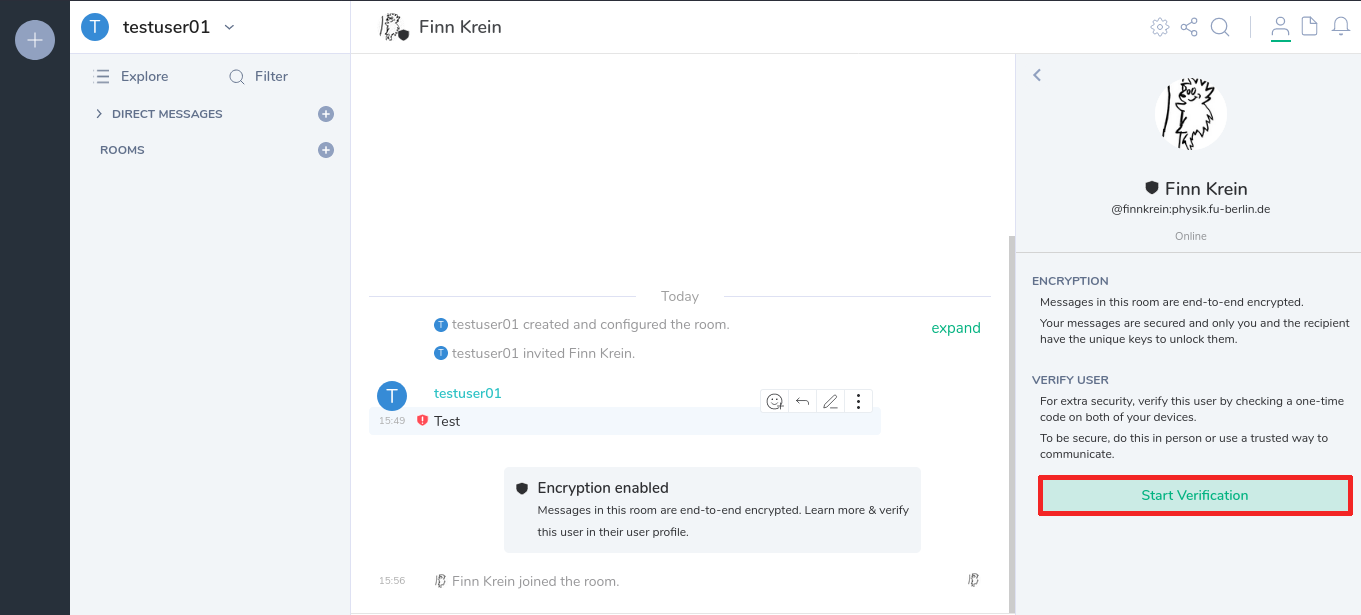
Click on the verify link in the sidebar…

and click on the "Start Verification" button.
The user you want to verify will see the request as a popup on the left and in the chat.


You will then be presented with the verification options. Currently the only option is comparing a string of emojis. When both users have agreed on a verification method the verification process begins.
If the user you are verifying with is shown the same string of emojis as you are, you can both click on "They match" to complete the verification.

Verify a session
To access your encryption history and for other users to verify you it is necessary to verify a new session. To verify a session you can either confirm a new session from an existing session or enter your recovery passphrase.
When logging in with a new device you will get prompted to verify it.
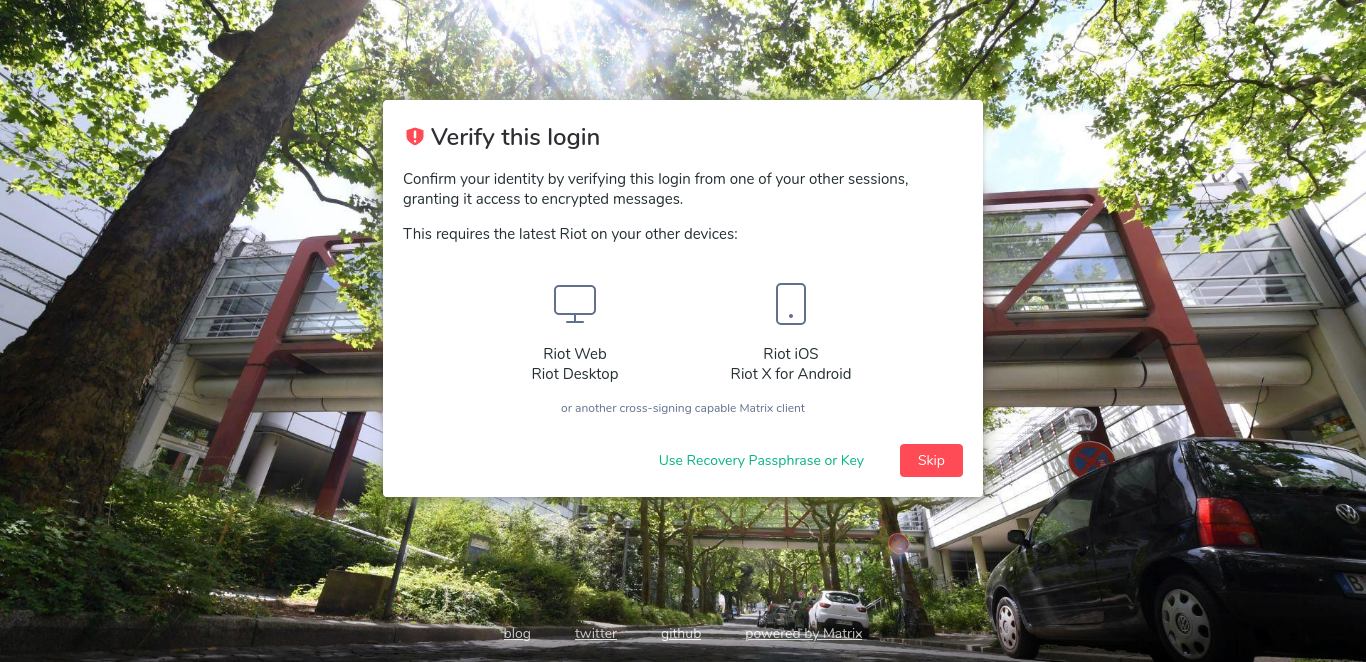
If you are logged into another session there will be a popup asking you to verify the new session:

Click on the green "Verify" button in the popup and an explaining popup will appear.

Select to continue and you will be asked for a verification method. Currently the only option is to compare a sting of emojis.

Compare the emojis in the two sessions.


Confirm the emojis match on both devices to complete verifying the session.
Alternatively you can select to verify a session by using your recovery passphrase:
Deleting a session
If you have old unverified sessions that you don't have access to anymore, it is best to delete them so that other users don't see you as unverified.
To find out if you have unverified sessions left, enter a chat in which you participate and find your name in the user sidebar on the left. If you have unverified sessions, there will be a red shield icon on your user icon.
If you have unverified sessions, click on your name in the sidebar. This will show you a list of your sessions and which of them are unverified.
Click on each of the unverified sessions which you can not access anymore and note down their session-ID. (In the picture below it is VBPCSWTETS)

To delete the session you noted down, click on your Name in the top left corner and select the settings.
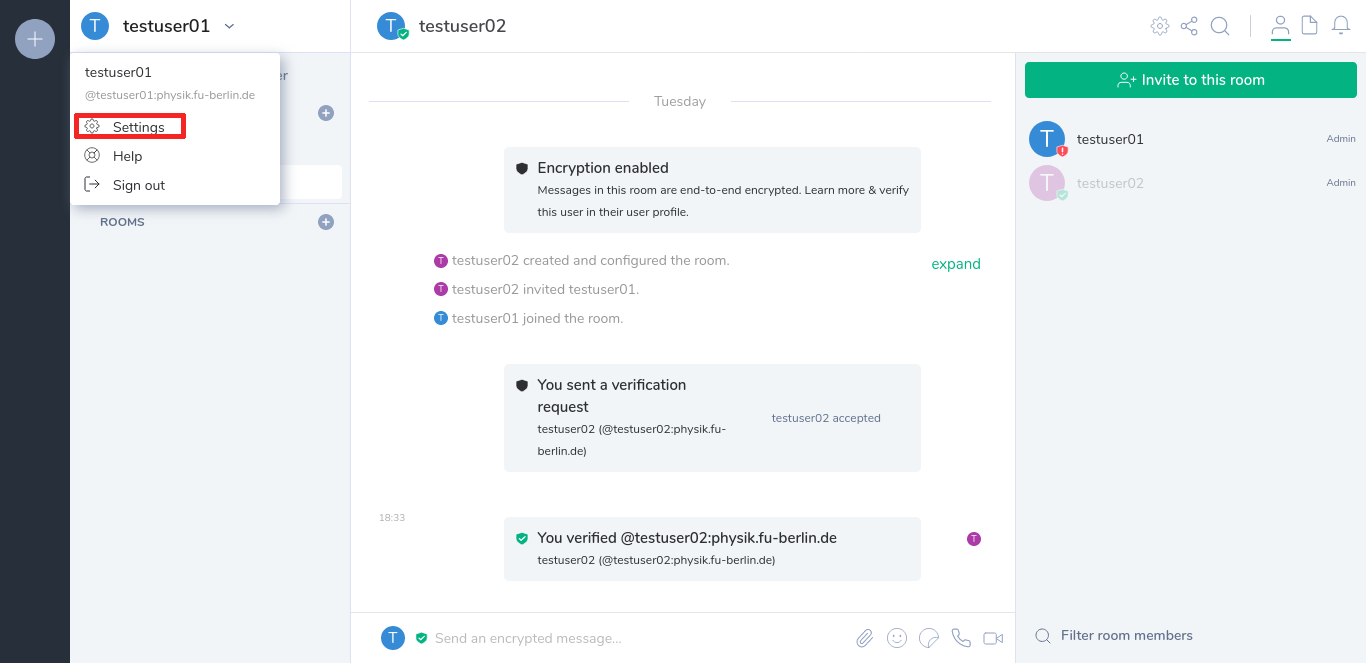
In the settings menu select the section "Security & Privacy"

In the "Security & Privacy" setting select all the session you want to delete and click on "Delete sessions"

Usage tips
- You can search for other users by their display name or ZEDAT username, the display name is the person's name by default, but users may change it.
- You can highlight messages for certain users by mentioning them. You do this by typing
@followed by their name, use tab to autocomplete. - The little symbols to the right of messages are read markers.
- Messages can be formatted in Markdown (tables are unfortunately not supported in the current Markdown flavour).
- You can share images and files.
- Emojis can be typed by starting with a colon
:followed by the name, choices will pop up. - Messages can be edited after sending them. Use the context menu when hovering over a message.
- You can reply to messages, quoting them thereby. Use the context menu when hovering over a message.
- You can react to messages. Use the smilie context menu when hovering over a message.
- You can add a Jitsi widget using our Jitsi server to bind a fixed Jitsi room to your Matrix room via the Widget integration menu (the 2x2 squares on the upper right). Be advised, the other integrations besides Jitsi use external resources.