Table of Contents
This is a section of the manual on how to use Element's end-to-end-encryption. To see the rest of the manual, find the page here
End-to-End-encryption for Matrix on Element
End-to-end encryption means that only the parties participating in a conversation are able to decrypt and read the messages that were send. Our server is not able to decrypt the messages that were sent, preventing third parties to read the messages.
The somewhat short story
Some chats you encounter will be encrypted. Direct conversations are encrypted by default and encryption for rooms for multiple people can be switched on. When using encryption in a room (or direct chat) all messages in that chat will be encrypted. Each of your clients (e.g. the web client at meet.physik.fu-berlin.de or Element on your phone) will have a session with its own keys. This is mostly transparent to you as a user, but you must always hold either of the following to be true to keep access to your old encrypted messages:
- Have one running session (in a browser on your computer, on your phone, wherever), so that new sessions can authenticate against the running session (cross-signing, described below), or
- have access to your recovery passphrase (that you should create when you first log in) to recover your encryption keys when you log into a new session and have no other running sessions to authenticate against.
This means, that if you do have encrypted messages, e.g. in a direct chat, and you were only logged into one session, e.g. only in the web client, and you don't have a Security Phrase or Security Key set up, i.e. you log out and decline to set one up, when asked, you will lose access to those messages.
This may sound difficult, but it's not. Read on for what you need to do.
Setting up encryption for the first time
When you haven't set up a Security Phrase or Recovery Key and are about to log out of your only session Element will ask you to set one up. You can also do this manually. Open the Security & privacy menu in the Settings.
Below the list of active sessions, you will find section Secure Backup, that will look like this, if you haven't set it up yet

Click on Set up to start. You will be shown this menu

By default the upper point (Generate a Security Key) is selected, but it's better to choose Enter a Security Phrase. What's the difference?
- A Security Key is a long random key, that you probably won't be able to memorise. It's purpose is to be stored somewhere safe, e.g. in a password manager like KeePassXC.
- A Security Phrase is that: a phrase, something that you will (hopefully) be able to remember, because you choose it, e.g. by a method like this.
Also, when you generate a Security Phrase, you will be offered to generate a Security Key as well. So why not get both for the price of one?
Once you click Continue you can enter your passphrase
which you then need to confirm

Afterwards you will be offered to also get your Security Key

And to finish the setup, you need to confirm everything with your ZEDAT password

After you're done with you can have a look at the settings again, where it will look like this if you were successful.

This is also where you can start over - via the Reset button - if you forget your Security Phrase and/or lose your Security Key, but still have access to your session, because you never log out.
Verifying a session
To access your messages from encrypted chats, e.g. direct conversations, it is necessary to verify a new session. To verify a session you can either confirm a new session from an existing session, which is the easiest way, or enter your recovery passphrase.
When logging in with a new device you will get prompted to verify it.

The three options: - Use another login, which will authenticate against a running session, e.g. on a phone or another computer. - Use Security Key or Phrase, which works without another session, i.e. without another device, but you will need the Security Phrase or Key that you set up earlier. - Skip, which skips authentication, but you won't be able to read encrypted messages that were sent to you earlier.
Verifying a Session using a Security Phrase
This is conceptually the easiest so, we'll discuss it first. Click Use Security Key or Phrase and in the screen that opens enter either your Security Phrase or your Security Key.

If you enter either correctly, you will be greeted by this happy screen

Verifying a Session using a Security Phrase
If you are logged into another session, e.g. on your phone, it's easiest to click Use another login. There are multiple ways how this is handled, which depends on where the other session is running, e.g. Element on phones will allow you to do this via scanning a QR code. All methods do require, though, that you have the device where the other session is running on at hand otherwise the whole process will block waiting for you to do something on the other device, which is hard to do, if it's far away.
One method that is always available is comparing emoji shown on both devices. First you will be asked on the device with an already authenticated session whether the new session is you and whether you want to authenticate it.

Click on the green "Verify" button in the popup and an explaining popup will appear.

Select to continue and you will be asked for a verification method.

Compare the emojis in the two sessions.


Confirm the emojis match on both devices to complete verifying the session and you get the happy result of a verified session.
Deleting a session
If you have old unverified sessions that you don't have access to anymore, it is best to delete them so that other users don't see you as unverified.
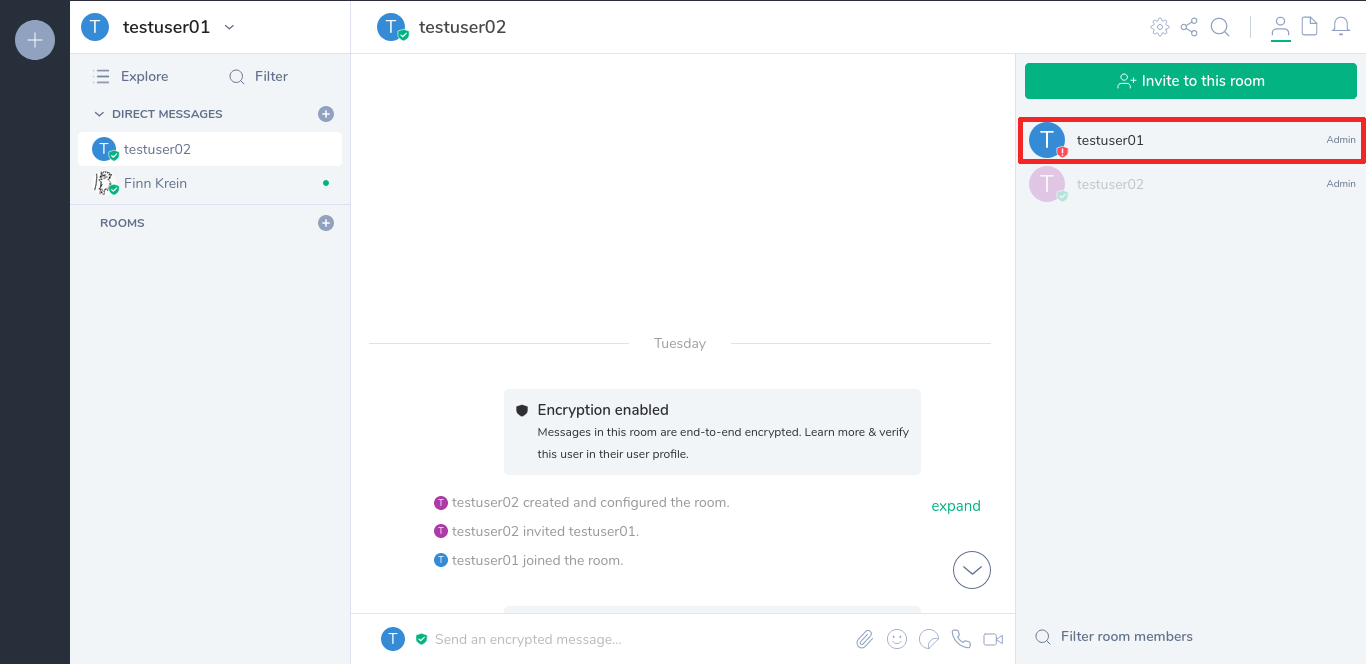
To find out if you have unverified sessions left, enter a chat in which you participate and find your name in the user sidebar on the left. If you have unverified sessions, there will be a red shield icon on your user icon.
If you have unverified sessions, click on your name in the sidebar. This will show you a list of your sessions and which of them are unverified.
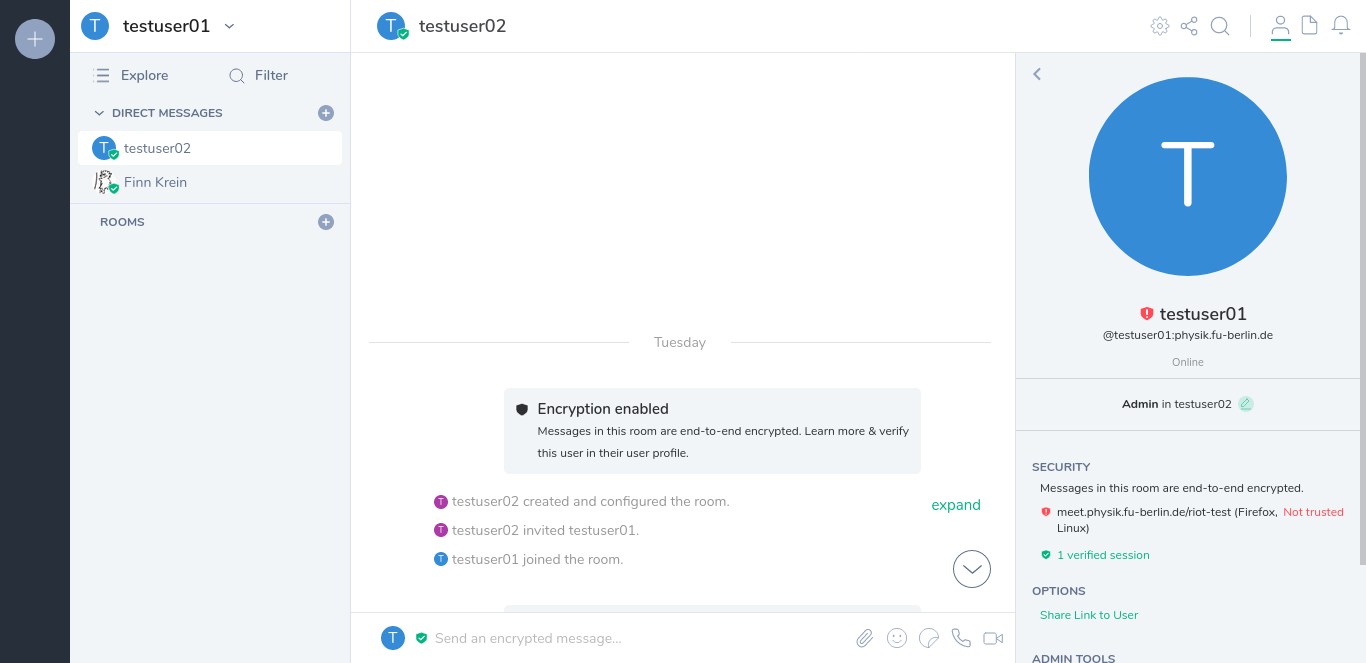
Click on each of the unverified sessions which you can not access anymore and note down their session-ID. (In the picture below it is VBPCSWTETS)

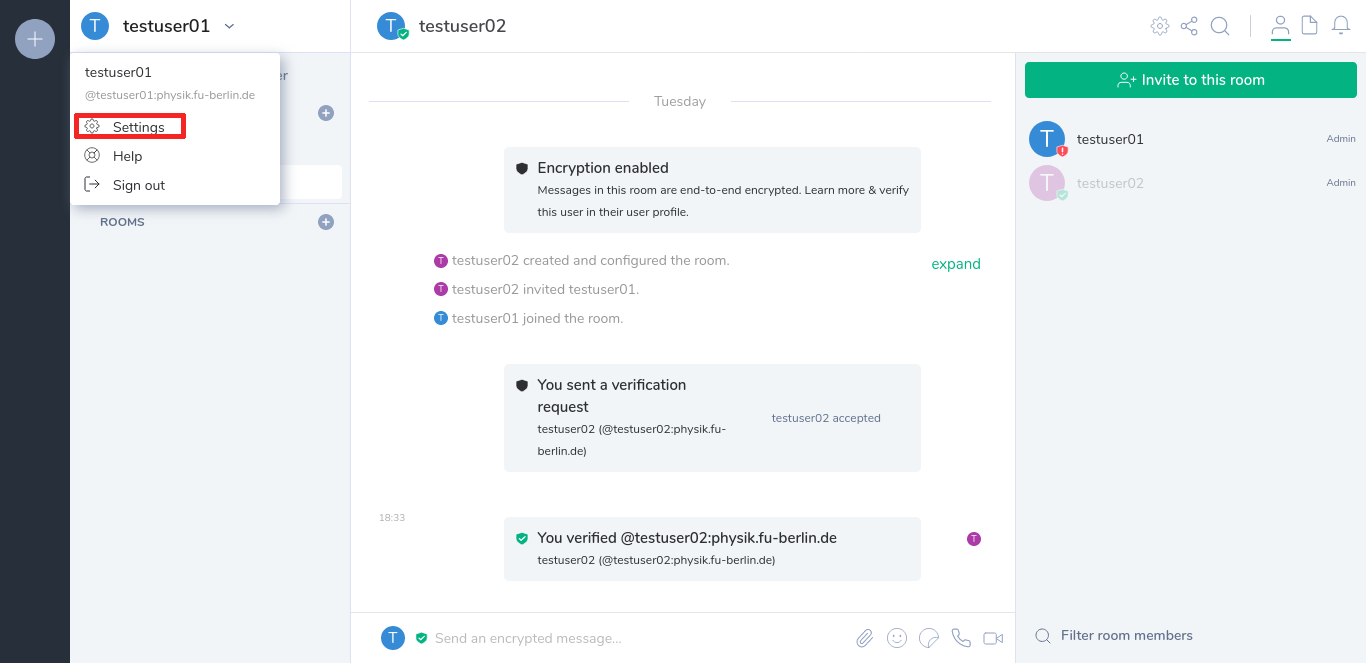
To delete the session you noted down, click on your Name in the top left corner and select the settings.
In the settings menu select the section "Security & Privacy"

In the "Security & Privacy" setting select all the session you want to delete and click on "Delete sessions"

Verifying a user
This step is optional If you choose to not verify a user there will be a black shield displayed next to their user icon ![]()
For end-to-end encryption to be really secure users have to verify they are talking to each other. To do this each user is verifying each their devices, and additionally verifies every user once. Every device another verified user verified themselves will be considered verified.
A user you did not verify will be displayed with a black shield next to their user icon: ![]()
A user you verified, but who did not verify all of their devices will be displayed with a red shield next to their user icon: ![]()
A user you verified and who verified all of their devices will be displayed with a red shield next to their user icon: ![]()
Example: Alice and Bob start a conversation in their logged in sessions. For the encryption to be secure they have to verify they are actually talking to each other. In Element this is done by comparing a list of emojis that are shown to both users. Alice requests a verification with Bob and they verify they get shown the same string of emojis. When Bob starts using a new session (e.g. using a different Browser/Device) he can use the session that was verified with Alice's session to also verify his new session. Alice's session automatically sees that Bob verified the new session and accepts it into the encrypted conversation.
For this step to make sense you have to be able to communicate with the other user in a way that makes sure you are actually talking to them. For this we recommend video/audio-chat, or just sitting next to each other.
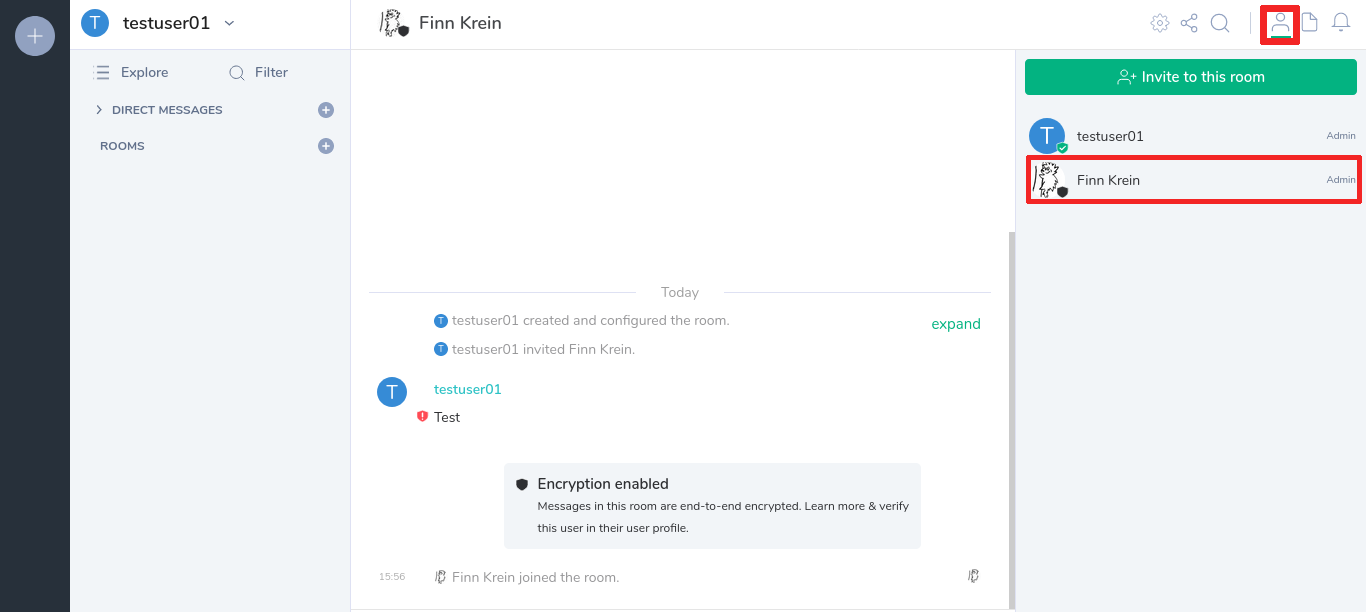
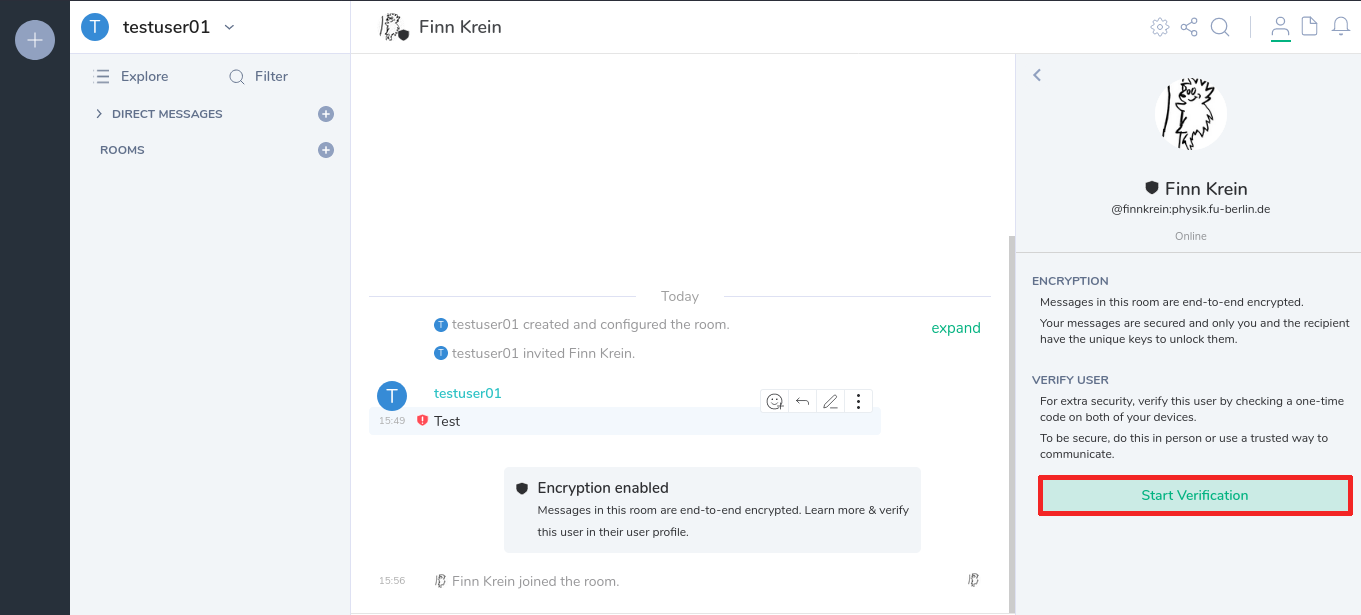
To verify a user you open a chat you share with the user and click their name in the user side bar.
Click on the verify link in the sidebar…

and click on the "Start Verification" button.
The user you want to verify will see the request as a popup on the left and in the chat.


You will then be presented with the verification options. Currently the only option is comparing a string of emojis. When both users have agreed on a verification method the verification process begins.
If the user you are verifying with is shown the same string of emojis as you are, you can both click on "They match" to complete the verification.

I've lost all my keys! What now?
Sometimes it happens. Your computer and phone die at the same time and those were the only clients you were logged in at and you didn't save your passwordmanager database (hopefully you are using one) where you store your recovery keys or recovery passphrase to any other device. What now?
Well, all your encrypted messages, i.e. messages in rooms or private discussions were encryption was enabled, are gone and you won't get them back, but you can make yourself new recovery keys for the future (and hopefully you will safe them redundantly). To this, just click Use Security Key or Phrase
on the verification dialog after login and instead of entering your security phrase or key, which you've lost, click the Reset all link on the bottom, next to Forgotten or lost all recovery methods?
You will then be asked to confirm

And clicking Reset will sign out of all your old sessions and delete all keys, followed by guiding you through the procedure to generate new ones described above.
I'm asked to authenticate every time I open my browser. What am I doing wrong?
You will need to reauthenticate (that means: type in your recovery passphrase or use another session to authenticate your new one) whenever you log out of https://meet.physik.fu-berlin.de or your browser loses its cached data and cookies. That means, if you are especially privacy conscious and configure your browser to delete cookies and caches on exit, your running session will die as well.
https://meet.physik.fu-berlin.de only sets first party cookies and uses the local browser cache for some of its data. Whereas third party cookies are definitely are a privacy problem (and Firefox' Enhanced Tracking Protection can really help you with that out of the box even without uBlock Origin, which is something everybody should use), can deleting first party cookies be a tad overzealous, since the server you are contacting sees everything you do with it anyway. Deleting the cookie and cached data interferes with how the client at https://meet.physik.fu-berlin.de operates. You can resolve this problem by granting an exception to deleting this data in your browser's preferences.
On Firefox you can do this on the Privacy & Security page of the settings in the section Cookies and Site Data. If you have checked Delete cookies and site data when Firefox is closed, this is the reason for needing to reauthenticate after every time you close Firefox. Click the Manage Exceptions button (Manage Permissions on older versions) and enter both https://meet.physik.fu-berlin.de and http://meet.physik.fu-berlin.de and save your choice.