Table of Contents
Connect to Linux hosts through x2go from a Windows computer (graphical login)
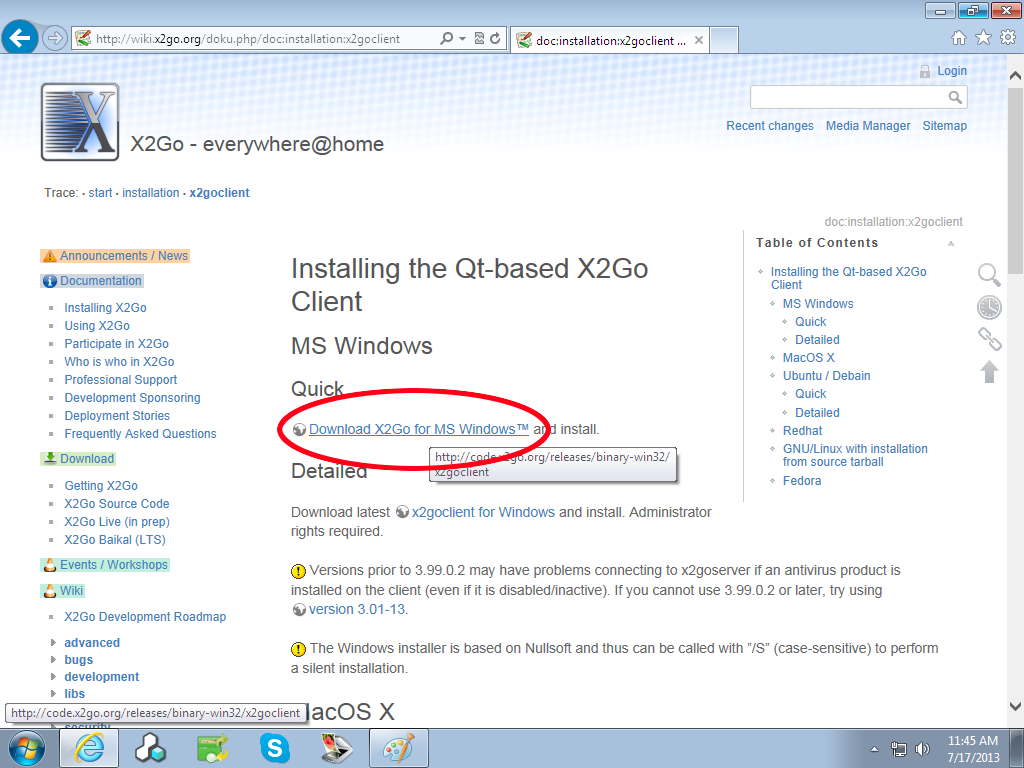
Open your web browser and navigate to the x2go client download website here:
Click on "Download X2go for MS Windows".
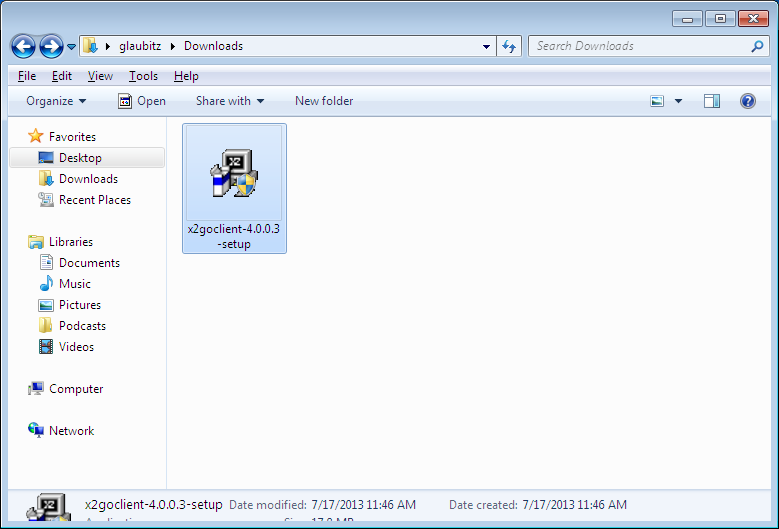
Click on "releases", then the latest available release (4.0.0.3 at the time this document was written). Download the file and open the containing folder. Double-click this file to initiate the installation of the x2go client for Windows:
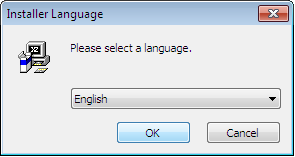
Choose your installation language and click "OK".
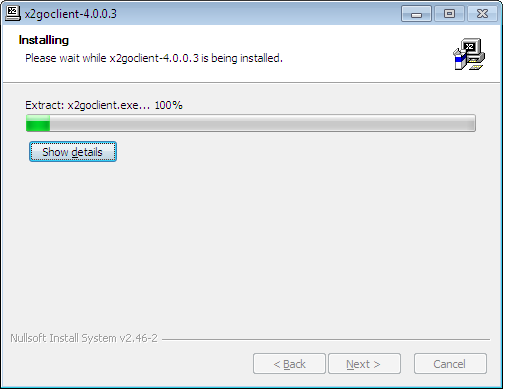
Follow the instructions on screen to install x2go client for Windows onto your computer.
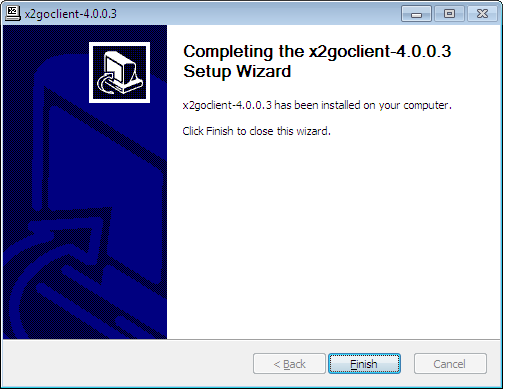
When the installation was successful, you should be prompted with the following confirmation dialog:
Now, open up your Windows applications menu (click Start→All Programs) and choose "X2go Client for Windows", then "X2goClient":
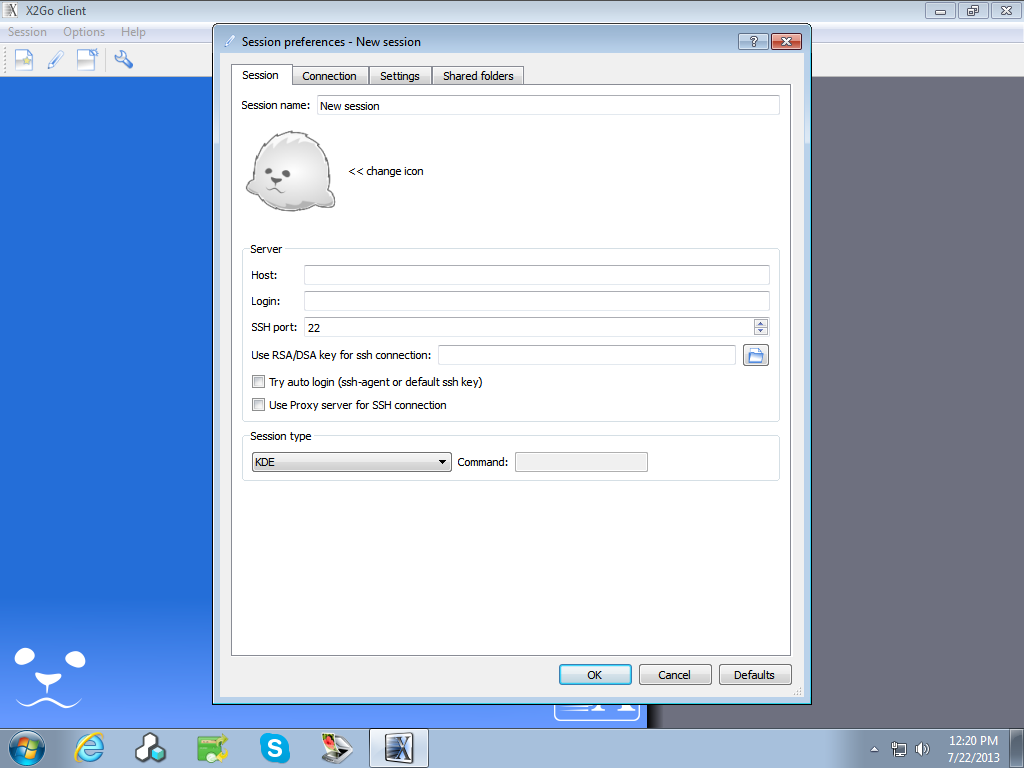
The main window of the X2go client will open and show a dialog to configure a new session upon first start:
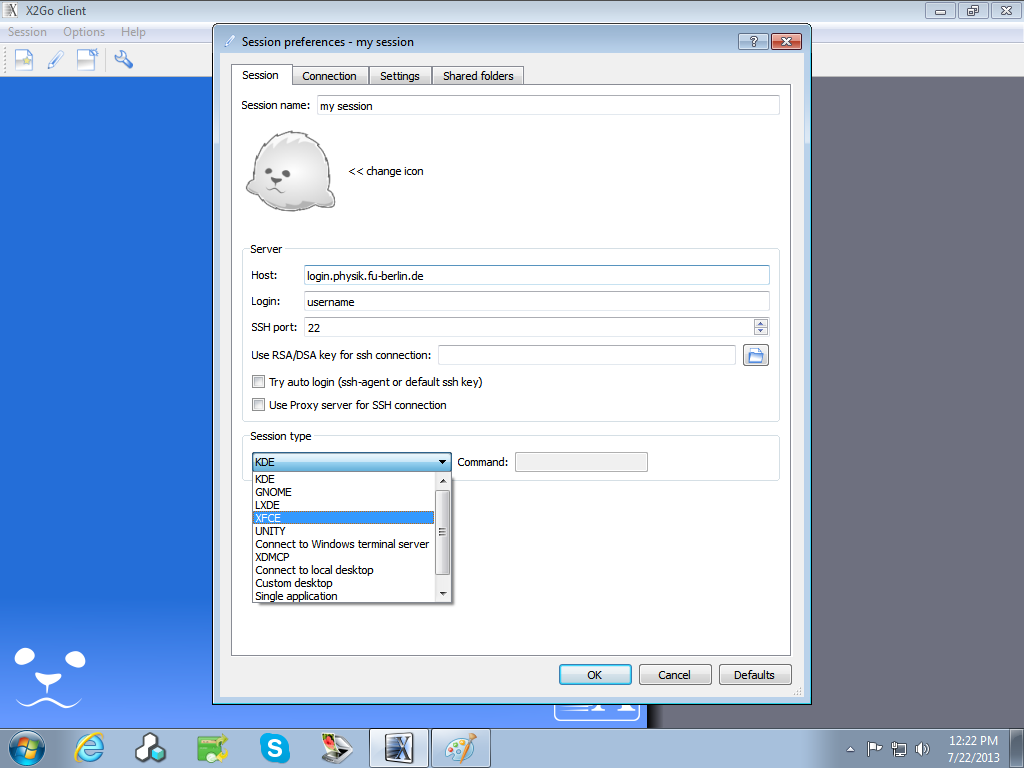
Use "Session name" to name this session for later reference, type the name of the computer you want to connect to into the field "Host" (login.physik.fu-berlin.de in this case), your username in the field "Login" and use the drop-down box below "Session type" to choose the graphical user interface you would like to use for login (the same way you would do when logging in to a Linux computer locally), then click "OK":
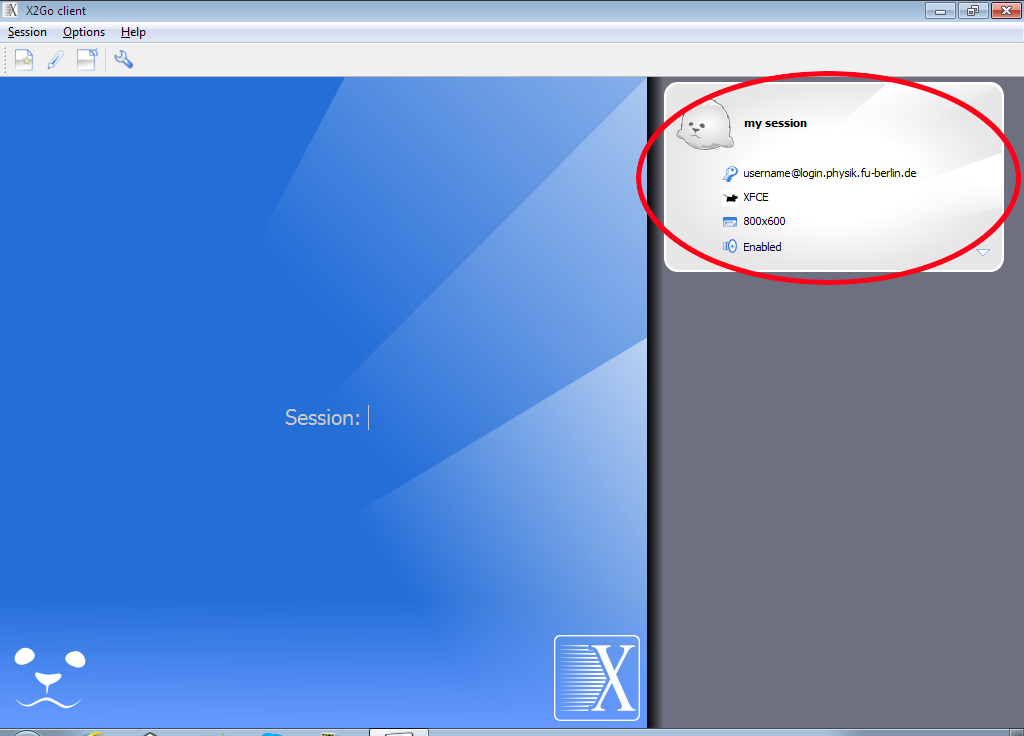
After clicking "OK", the main window should look like the following screenshot. Click the white area in the upper right which is indicated with an ellipse here:
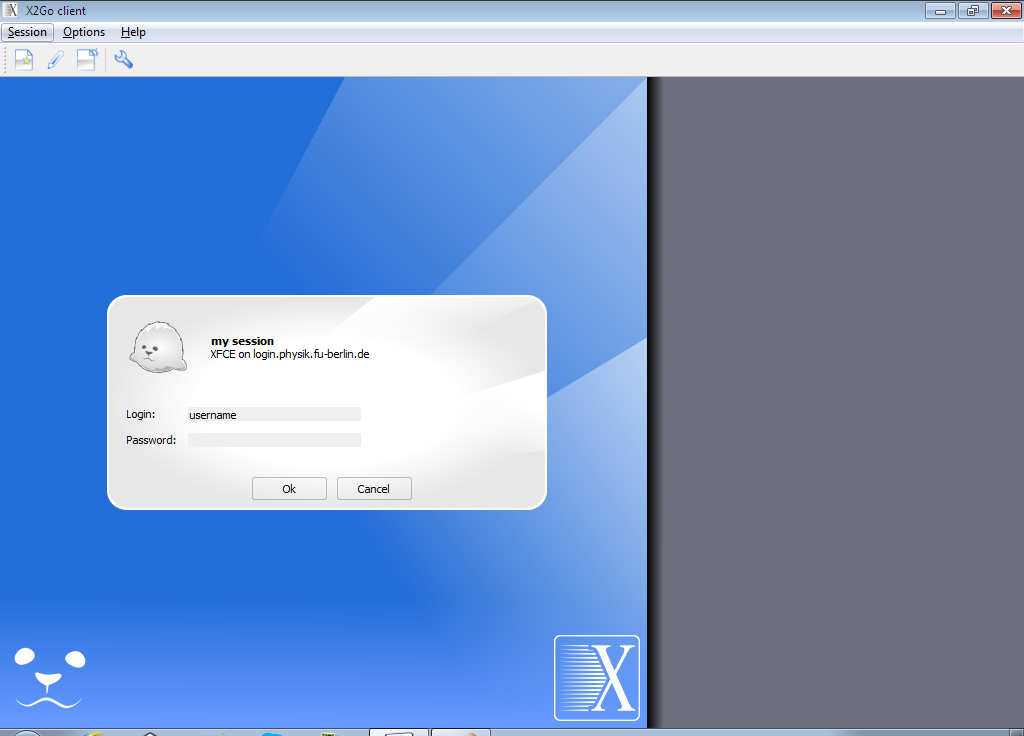
This will initiate the connection and ask you for your login credentials:
You will be asked whether you trust the remote host, click "Yes". This dialog will be shown upon the first connection only:
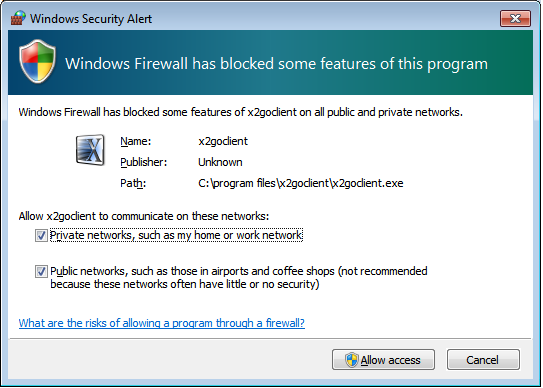
If you have configured a firewall, Windows may prompt you to grant access for the X2go software through your firewall. Click "Allow access" in both dialogs shown:
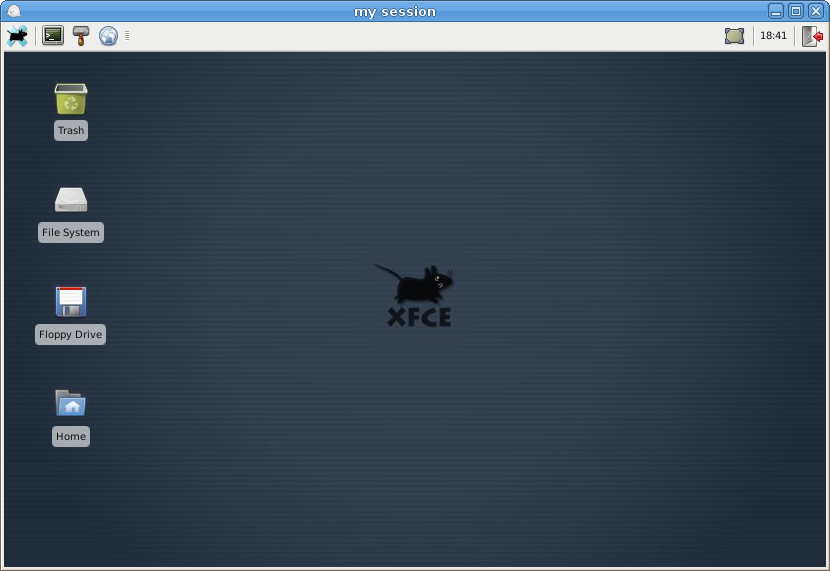
The connection will now be established and you should be presented with your familiar Linux desktop.
Connect to Linux hosts through x2go from a MacOS X computer (graphical login)
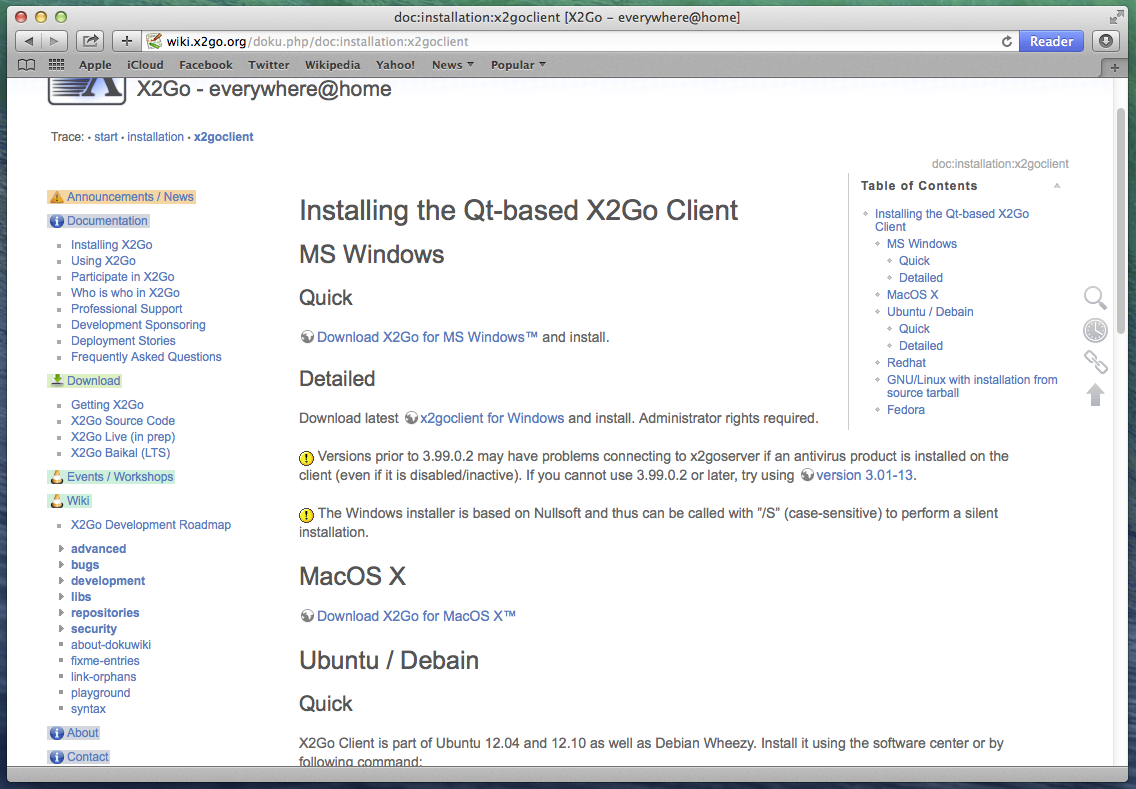
Open your web browser and navigate to the x2go client download website here:
Click on "Download X2go for MacOS X". Click on "releases", then the latest available release (4.0.1.0 at the time this document was written) and download the file x2goclient-4.0.1.0.dmg.
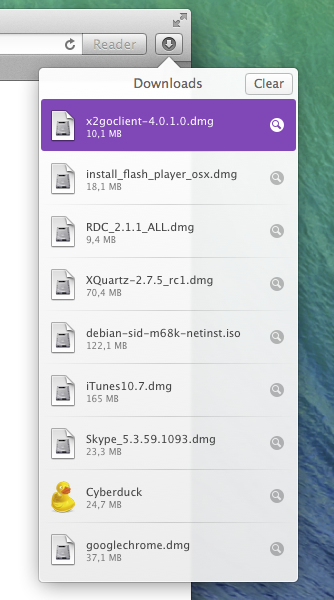
In Safari, find the file you just downloaded in the list of downloaded files and double-click it:
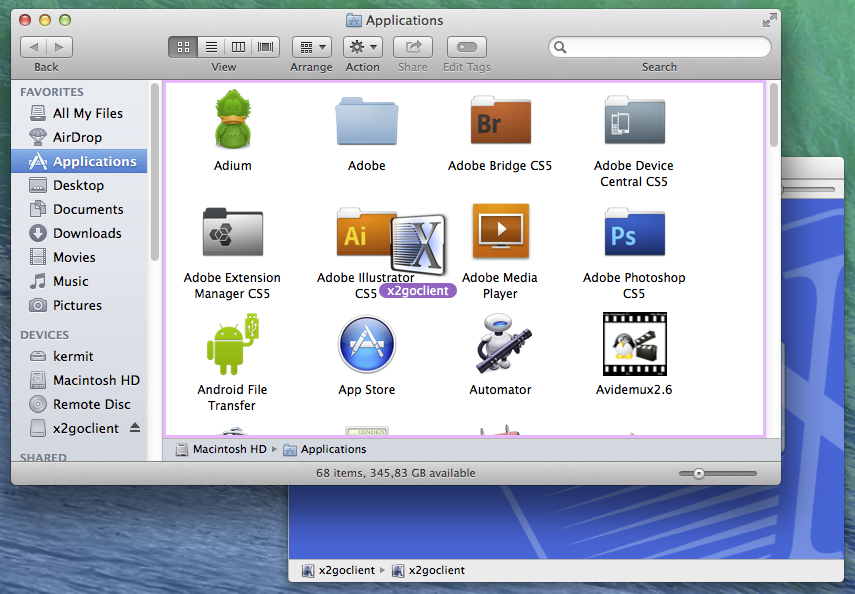
This will open a folder containing the x2goclient application. Drag and drop the icon into your Applications folder:
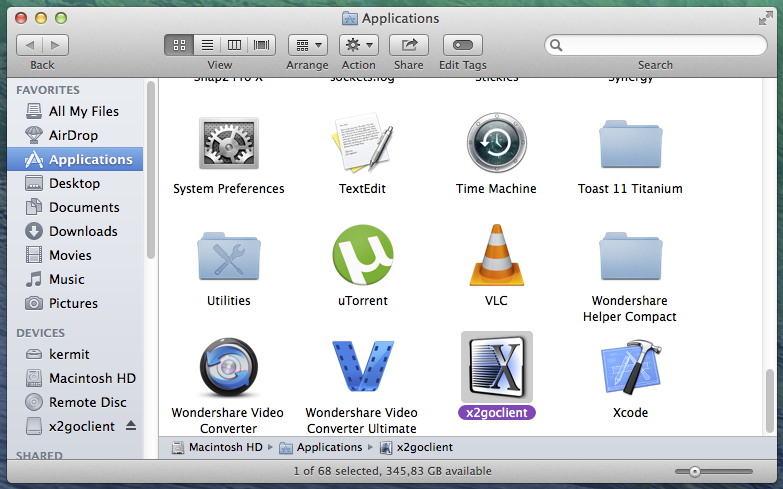
Find the x2goclient application icon in your Applications folder and double-click it:
MacOS X will pop up the following dialog to ask you whether you trust the application you just downloaded from the x2go website, click Open:
The main window of the X2go client will open and show a dialog to configure a new session upon first start:
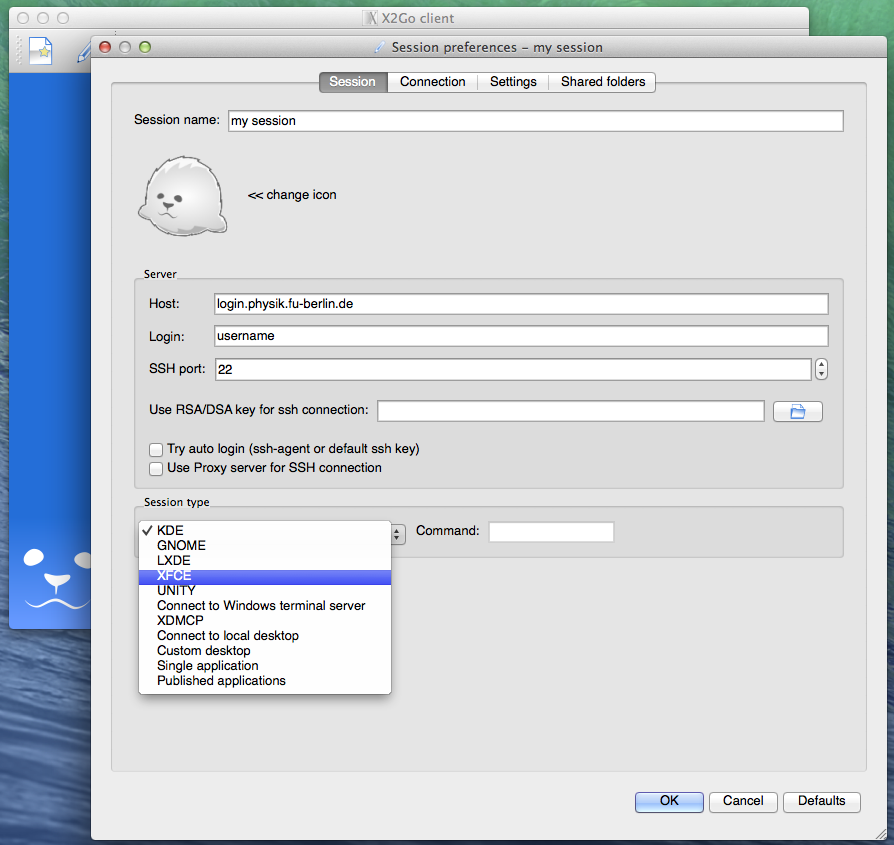
Use "Session name" to name this session for later reference, type the name of the computer you want to connect to into the field "Host" (login.physik.fu-berlin.de in this case), your username in the field "Login" and use the drop-down box below "Session type" to choose the graphical user interface you would like to use for login (the same way you would do when logging in to a Linux computer locally), then click "OK":
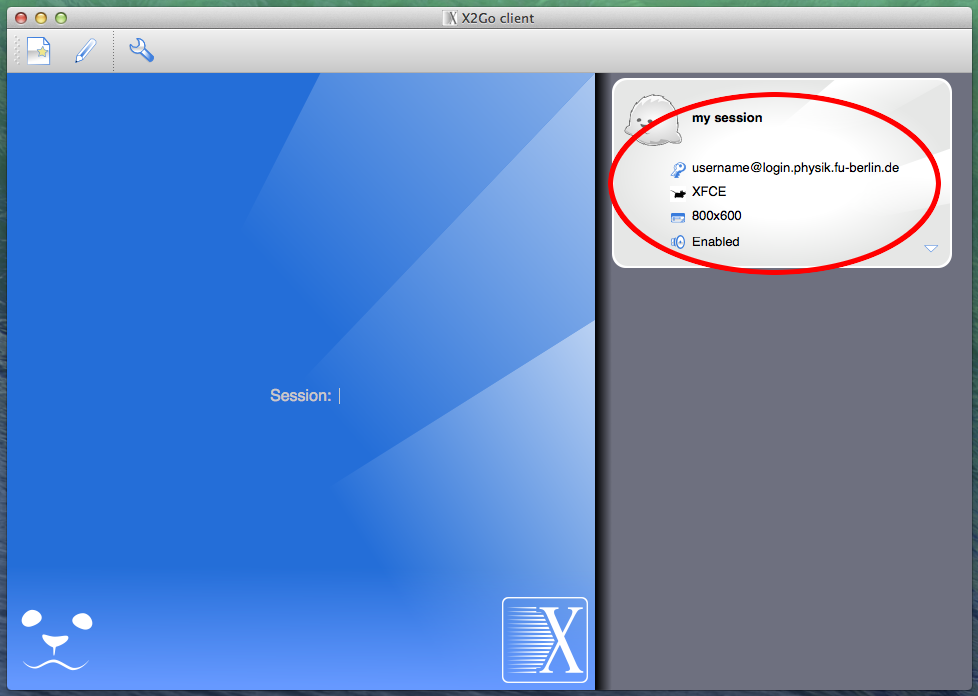
After clicking "OK", the main window should look like the following screenshot. Click the white area in the upper right which is indicated with an ellipse here:
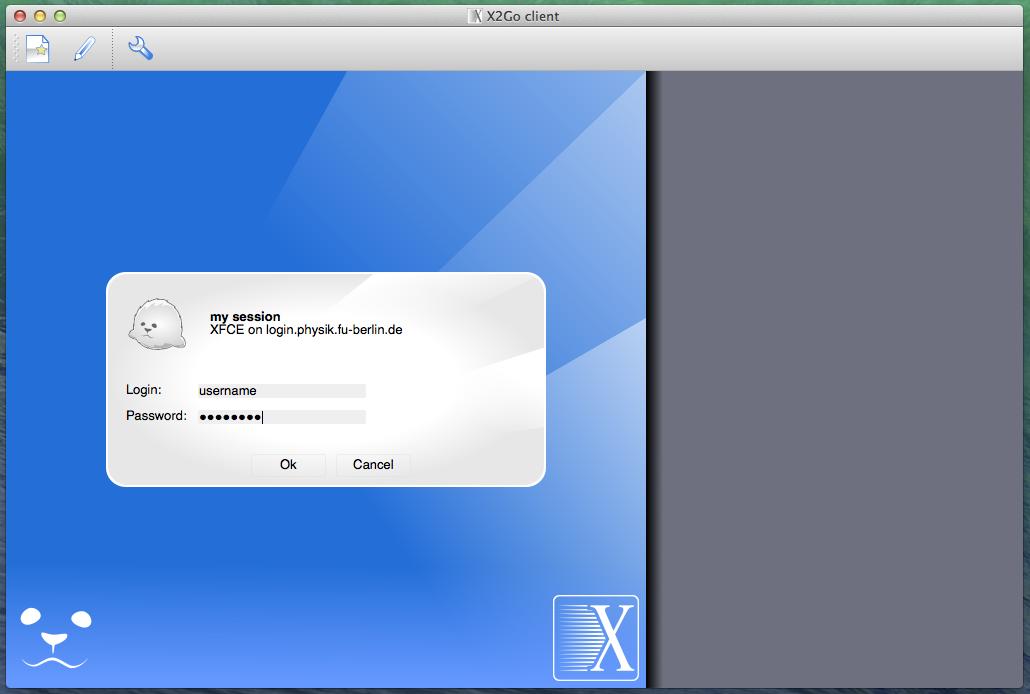
This will initiate the connection and ask you for your login credentials:
You will be asked whether you trust the remote host, click "Yes". This dialog will be shown upon the first connection only:
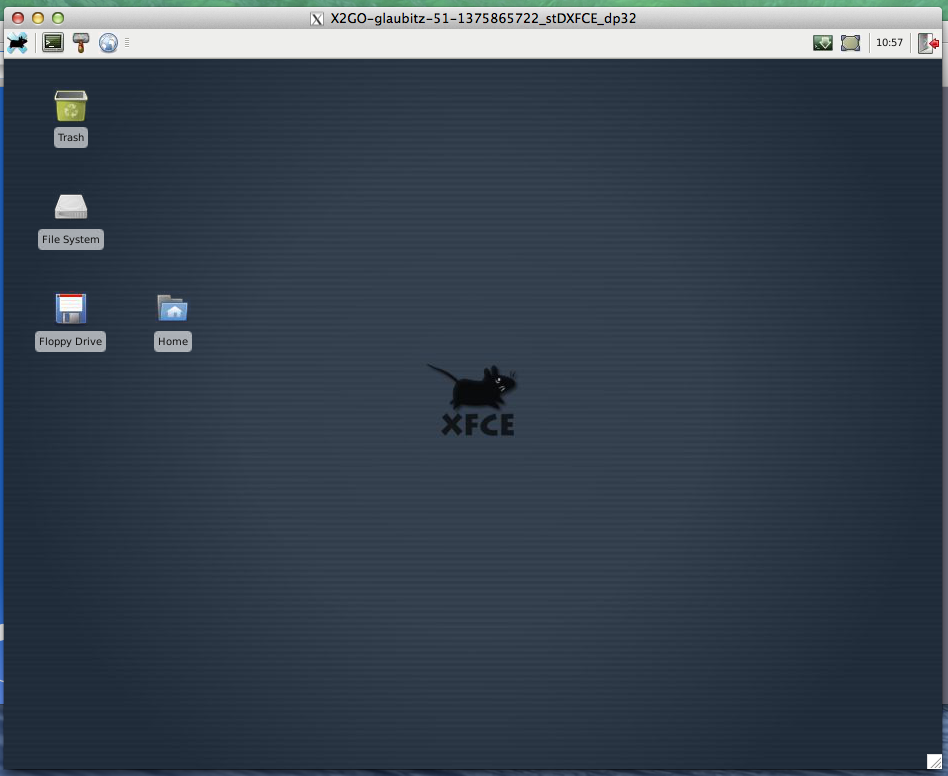
The connection will now be established and you should be presented with your familiar Linux desktop:
Connect to Linux hosts through x2go from a Linux computer (graphical login)
Before you can use the X2go client on Linux, you will probably have to install it first. In case it has already been installed, you can skip the next two steps.
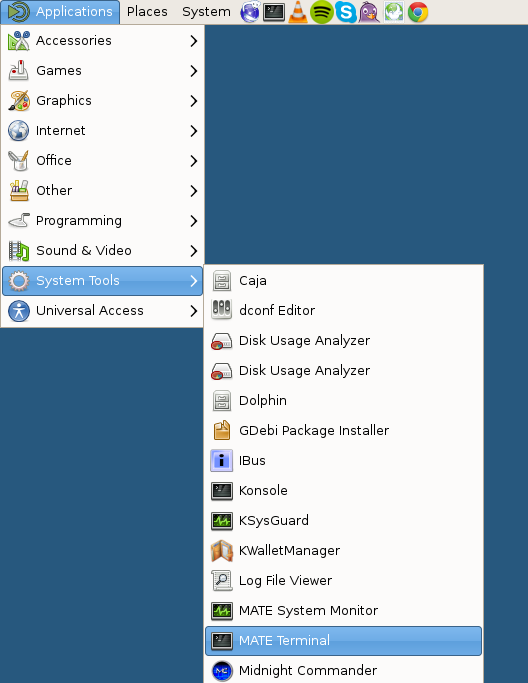
First, open a terminal by navigating through your Applications menu, choose System Tools and finally Mate Terminal:
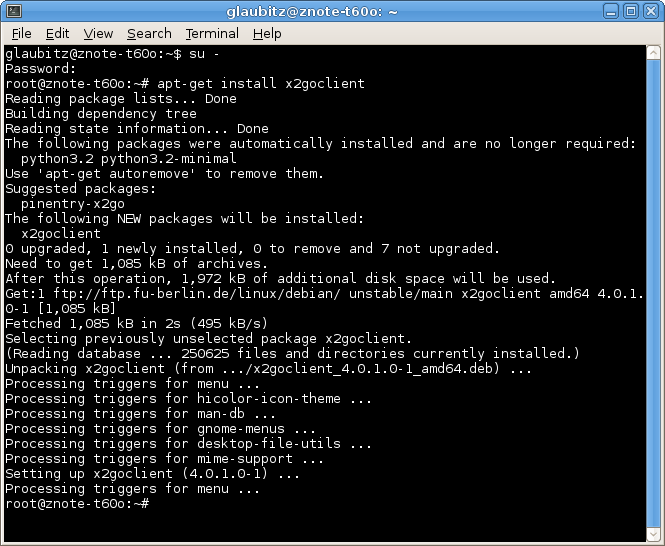
On Debian, type "su -" and your root password to become root. On Ubuntu, use the command sudo bash to achieve the same.
Then type apt-get install x2goclient to install the X2go client software onto your computer:
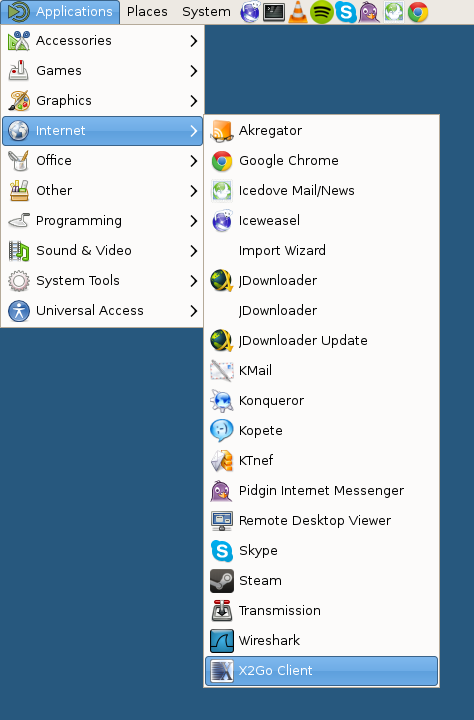
Once successfully installed, close the terminal window and navigate through your Applications menu again. Go to Internet and choose X2Go client:
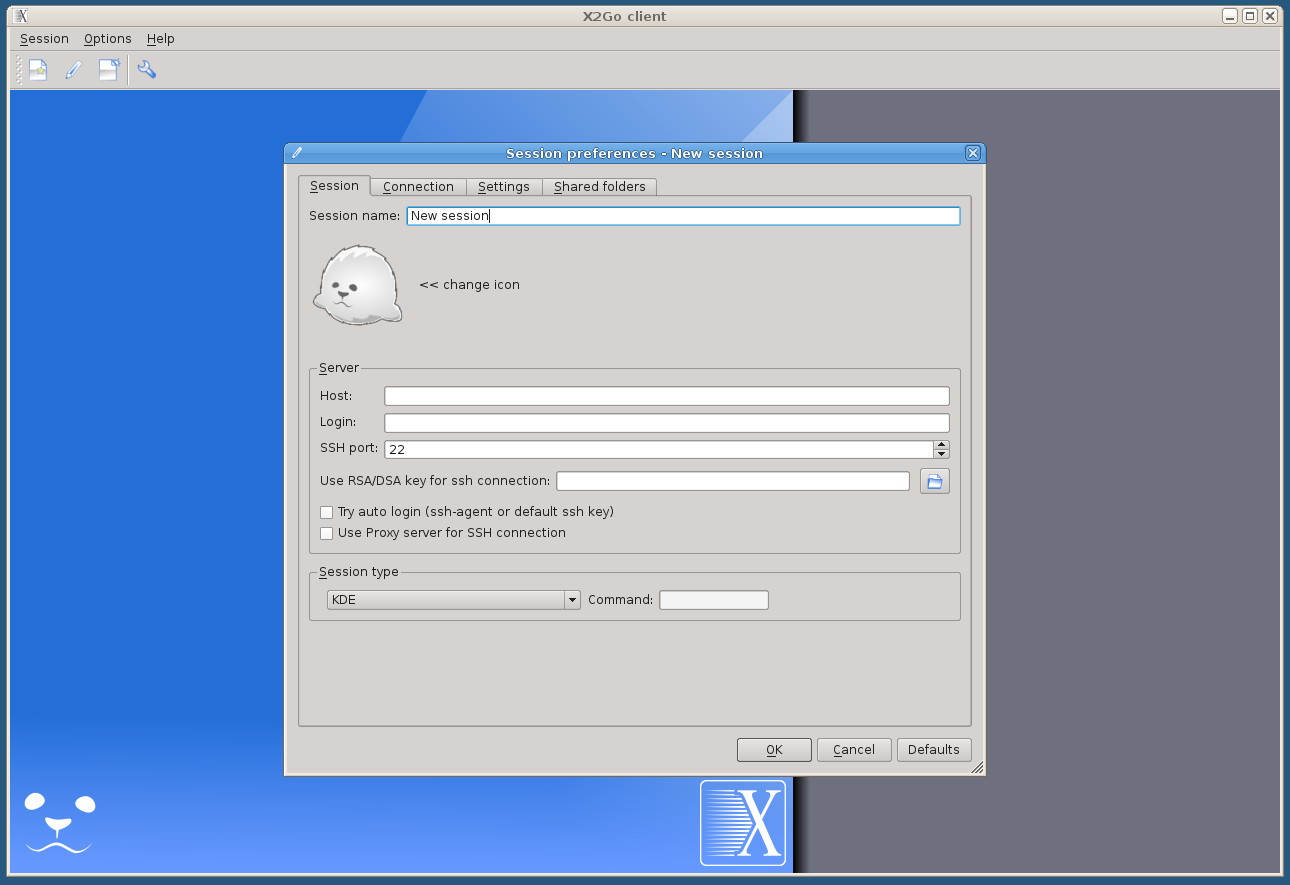
The main window of the X2go client will open and show a dialog to configure a new session upon first start:
Use "Session name" to name this session for later reference, type the name of the computer you want to connect to into the field "Host" (login.physik.fu-berlin.de in this case), your username in the field "Login" and use the drop-down box below "Session type" to choose the graphical user interface you would like to use for login (the same way you would do when logging in to a Linux computer locally), then click "OK":
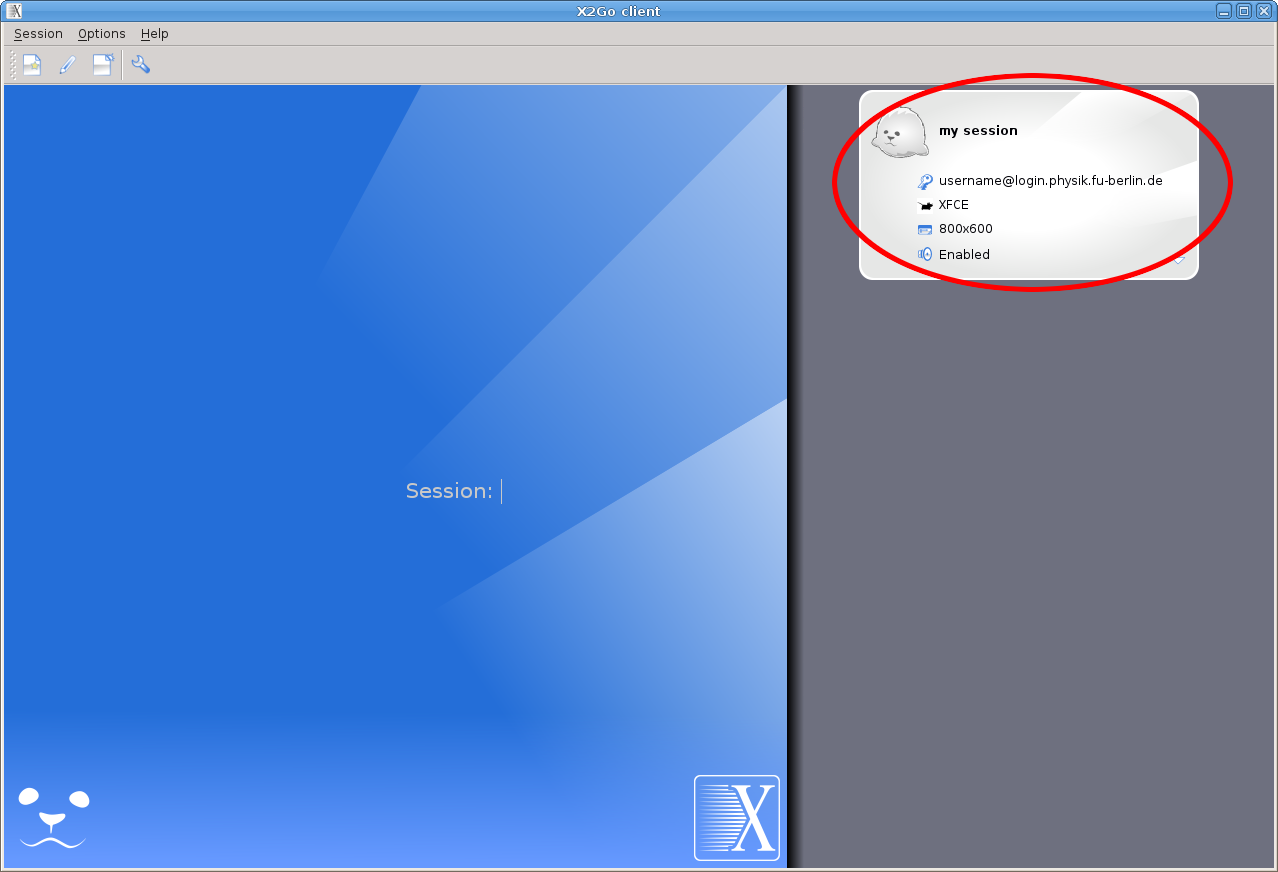
After clicking "OK", the main window should look like the following screenshot. Click the white area in the upper right which is indicated with an ellipse here:
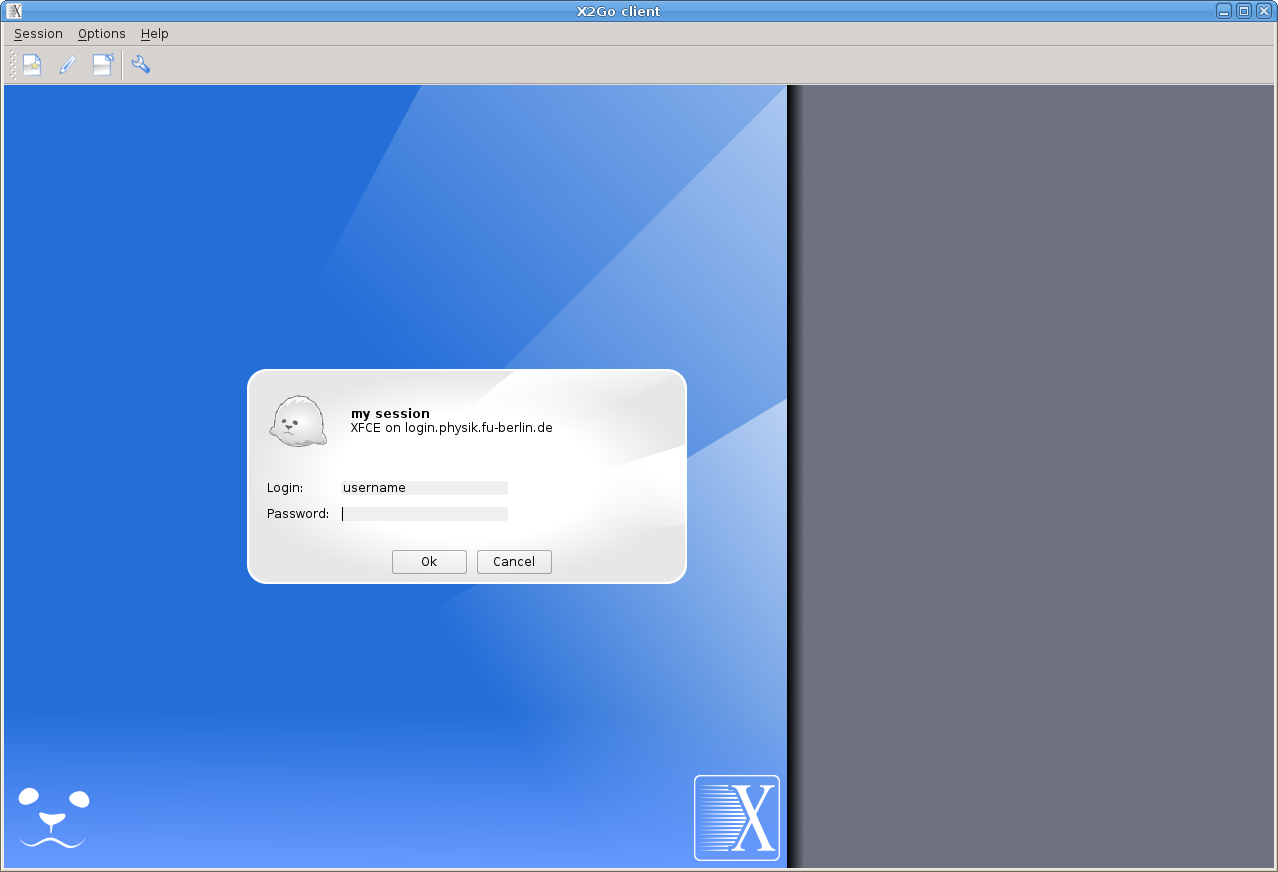
This will initiate the connection and ask you for your login credentials:
You will be asked whether you trust the remote host, click "Yes". This dialog will be shown upon the first connection only:
The connection will now be established and you should be presented with your familiar Linux desktop:

